Liquid Crystal Magna Resource Hub
Using LC Magna
Follow this flow for all the information you require to begin using your LC Magna.
Alternatively use the below navigation to navigate to sections of this guide.
Setting Up Your First Print
Installation
First look at Liquid Crystal Magna
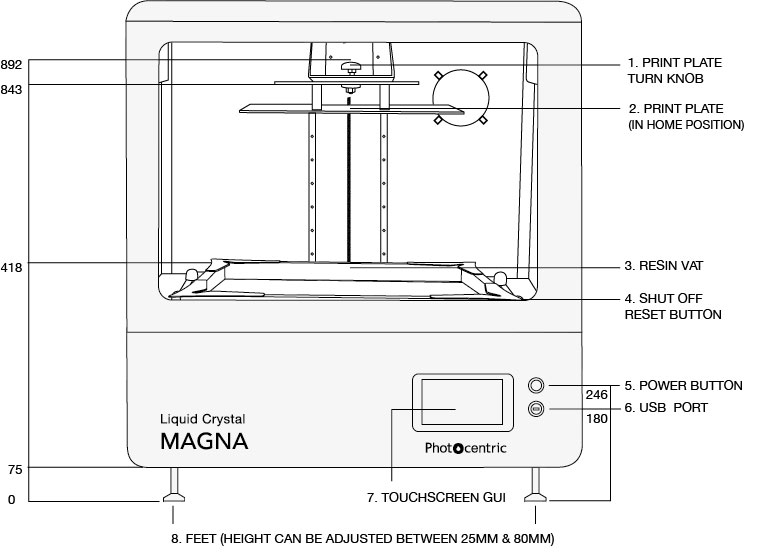
Figure 1: Liquid Crystal Magna front view
1. Print Platform Turn Knob- used to secure the print platform prior to printing or to remove it upon print completion.
2. Print Platform (in home position)- an Aluminium assembly with the following features:
a. A coating for easier cleaning and removing excess resin.
b. Roughened print platform silver surface to increase first layer adhesion.
c. The print platform has been pre-calibrated on our production line according to strict QC procedures. This ensures that the bottom surface of the print platform is parallel with the LCD screen.
d. Interchangeable platforms, print platforms can be swapped between printers without the need for re-calibration or homing. To achieve optimum Z accuracy, it is recommended that 2 or more new platforms are dedicated to one printer and swapped between each other.
3. Resin Vat- Contains the resin required to complete print jobs, featuring:
a. Spouts to ease the process of pouring resin back into its container.
b. Volume gauge which indicates the amount of resin inside the vat.
c. Durable optically clear film to ensure accurate prints and increased longevity.
4. Printer LCD Screen- Underneath the resin vat is a 24” LCD screen which displays the slices within the .cws or .zip file, curing the layer of resin between the vat film and the print platform. The screen is covered by a clear screen protector.
5. Shut Off/Reset Button- If a resin leakage occurs, it may enter one or more of the vat leak sensors. The sensors prevent resin from damaging the ‘Blow-Peel’ system by shutting off the valve/(s) and alerting the user by an alarm. For further explanation of the cleaning procedure after a vat leak, please follow the link to the support video on the Magna Resource Hub.
6. Power Button- to turn LC Magna ON and OFF, can be used to power the printer or in case of an emergency.
7. USB Port- to transfer sliced files via the USB Flash Drive provided or, any non-password protected USB to LC Magna.
8. Touch Screen GUI- This interactive GUI allows users to control, connect and maintain LC Magna by following simple steps.
9. Door Switch & Interlock- Safety feature to abort the movement of the print arm if the interlock is disengaged during printing.
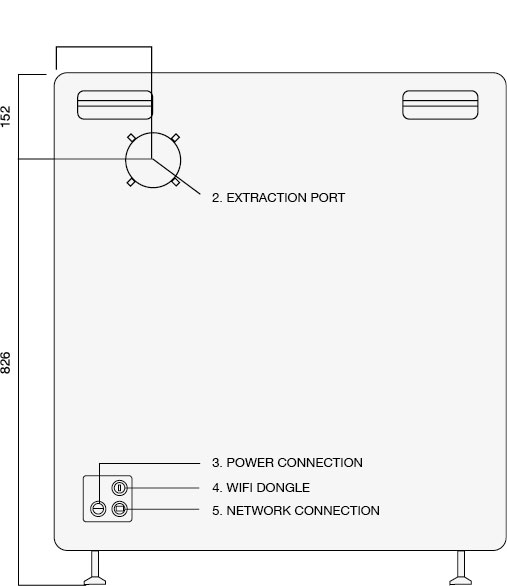
Figure 2: Liquid Crystal Magna – rear view
1. Lifting Handles- when moving LC Magna to a new location, the lifting handles can be used. Please refer to the LC Magna Installation Guide for further guidance.
2. Extraction Port- to connect LC Magna to an external extraction unit if required. Please refer to the LC Magna Installation Guide for further guidance.
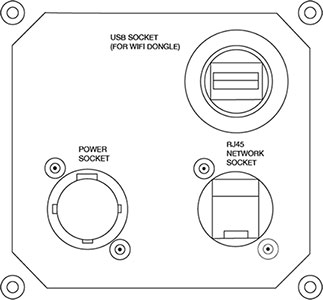
3. Power Connection- this socket has been carefully selected to ensure a secure and reliable power inlet.
4. USB Port for Wi-Fi Dongle- to plug in the provided Wi-Fi Dongle to enhance LC Magna’s Wi-Fi detection and connection to a secure local wireless network.
5. RJ45/Ethernet Network Connection- LC Magna can be securely connected to a LAN or RJ45 network.
Printer Set-up
By now and following Liquid Crystal Magna (LC Magna) Installation Guide, the printer should have been located in a suitable place and is now ready to be set up.
The printer power socket is on the back of the machine at the right-hand side. Only connect LC Magna to the mains using the power cable provided. Always plug the power cable into the mains socket, then into the printer before switching on using the power button at the front (as shown below). Similarly, always switch off the power at the front before unplugging the power cable from either the printer or the mains.
Once LC Magna has been connected to power, the foam blocks protecting the screen during shipping need to be removed before printing.
1. Close the printer door.
2. Select ‘Maintain’ from the Main Page on the GUI.
3. Select ‘Lift Platform’ and wait for the printer arm to reach its homing location.
4. Once the movement is complete, open the printer door and remove the foam blocks.
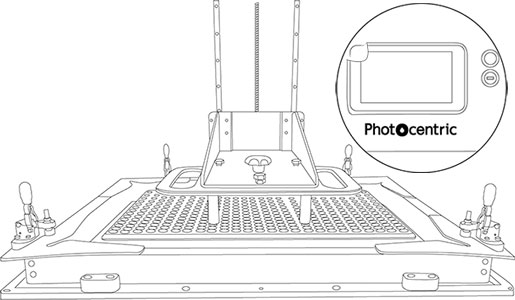
5. Remove the GUI screen protector.
6. The printer is now ready to use.
GUI Introduction
Liquid Crystal Magna GUI is the main control for users to print, control, maintain and connect the printer to a network.
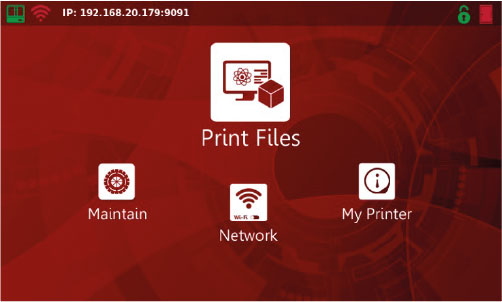
Main Page
The ‘Main’ page is the initial display when the printer is switched on and provides access to different menus.
In all other menus, the option to return to the ‘Main’ page will be available.
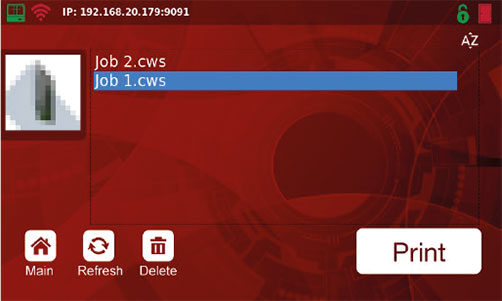
Print Files Page
This page displays the files stored on the printer either by online or offline transfer that are available to print.
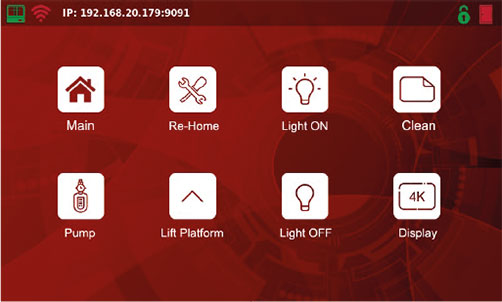
Maintain Page
The ‘Maintain’ page offers functions that check and maintain printer features. It is recommended that these features are used by or with the support of trained personnel.
NOTE: When selecting the ‘Maintain Page’ button, the LC Magna logo on the front panel will turn from red to blue.
Photocentric Studio Set-Up
A 32GB USB flash drive is supplied with your LC Magna. On this drive you can find a license number for Photocentric Studio. This allows you to activate a perpetual license for up to two PCs. Photocentric Studio can be downloaded here.
NOTE: Photocentric recommends saving the license file locally on your PC in case the USB provided is misplaced or damaged.
On this page, you can also find guidance on the following:
– The minimum system requirements for Photocentric Studio
– Installing the software
– Getting started
– Adding supports and slicing files
– Updating the software
1. Upon opening Photocentric Studio, select LC Magna/LC Magna V.2/LC Magna V.2 Fast Printing* from the machine profile drop down menu. Then, select the desired resin profile from the material drop down menu, click ‘Apply’ for the software to load.
* LC Magna V.2 Fast Printing machine profile only works for specific applications and resin. For more information, visit the Magna V.2 Fast Printing section on the Magna resource hub.
2. Import the desired file to Photocentric Studio and support as necessary. Please refer to the Photocentric Studio Support software videos for further guidance by following the link here.
3. Once satisfied, record the resin volume required to print from the tool panel for use when setting up the print.
4. Slice the file and save to a specified location on your PC.
5. Upload the file to LC Magna via USB or web transfer.
NOTE: See section Connecting to a Network for further guidance on network connection.
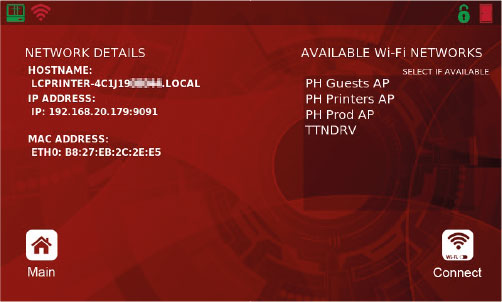
Network Page
LC Magna can be connected to a network to facilitate the uploading and removal of print files and to monitor prints in progress remotely.
Connecting to a network
Once your Liquid Crystal Magna is switched on, plug in the ethernet cable or Wi-Fi dongle to establish a network connection. This allows print file uploads and remote monitoring. These instructions are a guide to setting up the connection and uploading a print file
Connecting to a Network via Ethernet
Switch on LC Magna using the power switch at the front. Plug an ethernet cable into the designated socket at the back of the printer. Once the ethernet cable is connected, the IP address will be displayed in the top left corner of the Main GUI page.
Connecting to a Network via Wi-Fi
1. Plug in the Wi-Fi dongle to the USB port at the back of the printer.
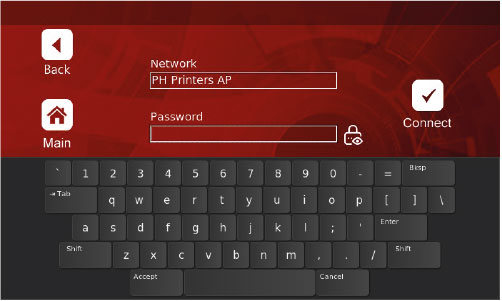
2. On the ‘Main’ screen, select ‘Network’.
3. Select the desired network from the list.
4. Select ‘Connect’.
5. Select ‘Password’.
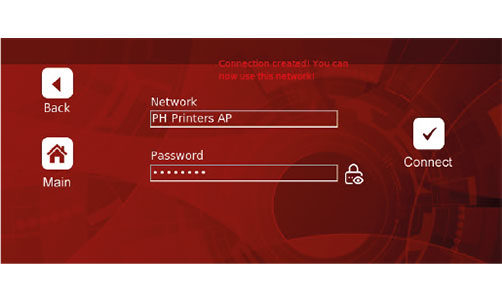
6. Enter the password for this network by using the on-screen keyboard. Password characters can be displayed by selecting the lock icon to the right of the text frame.
7. Select ‘Connect’ and wait for the connection to be established.
8. Select ‘Main’.
9. The Wi-Fi icon at the top left of the main page should now be green. The IP address should be displayed next to it.

File Transfer
Online File Transfer
1. Connect to a Network.
(See section Connecting to a network for further guidance).
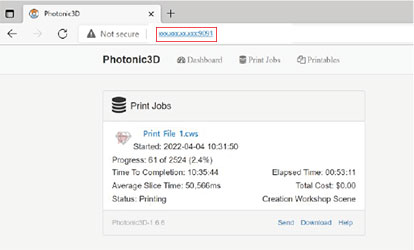
2. Open a web browser on your PC.
3. Type the printers’ IP address into the search bar.
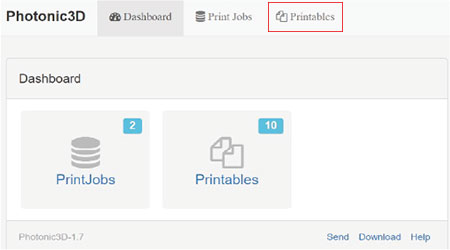
4. Select ‘Printables’ from the tabs at the top of the screen.
5. Select ‘Upload’.
6. Select ‘Choose File’ and locate the print file on your PC, the name of the file will appear to the right of the ‘Choose File’ button.
7. Select ‘Upload File’ and a progress bar will appear.


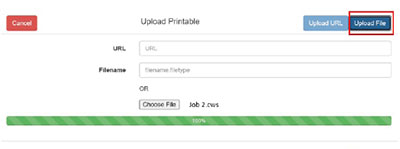
8. Once complete, the ‘Printables’ list will be updated to include the new file.
9. Select on LC Magna touch screen, go to ‘Main’ screen and select ‘Print Files’.


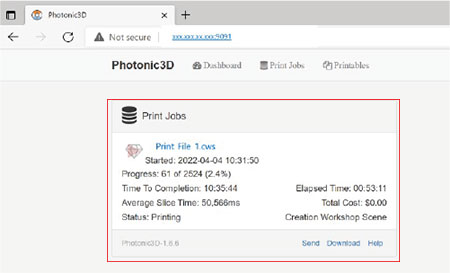
The progress of prints can be monitored in the ‘Print Jobs’ section of the webpage.
To delete files, go to the ‘Printables’ tab at the top of the page. Then, click on the relevant file and click ‘Remove’.

Online File Transfer
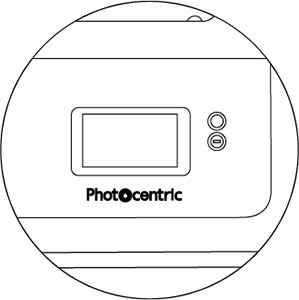
1. To transfer a print file to LC Magna, copy it to a USB flash drive, insert the USB drive into the USB port on the front of the LC Magna.
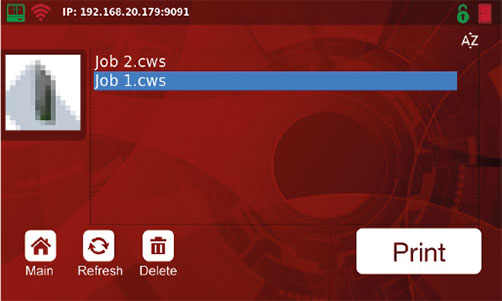
2. Select ‘Print Files’ from the ‘Main’ page.
3. Select ‘Refresh’, the new print file should appear after a few seconds.

HTTP Upload to Machine
1. Once the file has been prepared and sliced on Photocentric Studio, it can be uploaded to the printer from within the software if the printer has an established network connection.
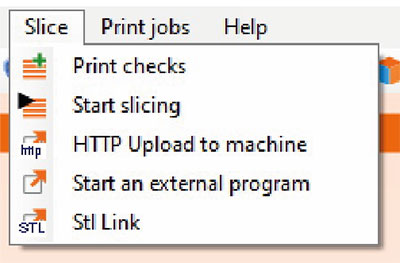
2. Select ‘HTTP Upload to Machine’ from the ‘Slice’ menu on the toolbar.
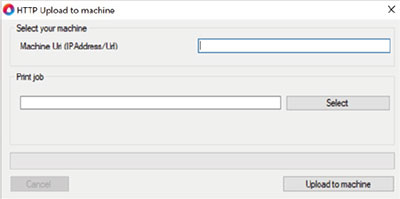
3. Input the IP Address of the printer in the following format: http://xxx.xxx.xx.xxx:9091/services/printables/uploadPrintableFile/
4. Click ‘Select’ to source the sliced file from its saved location, then click ‘Upload to Machine’.
5. Press ‘Refresh’ on the Print Files page of the printer to show the uploaded file.
6. The print file and progress can be accessed online by typing the IP address into the search bar of your browser.

Checking ancillary equipment
Before printing, it is important to ensure that the LCD screen protector, print platform, resin vat & Blow-Peel are in good condition and properly installed. Failure to do so may result in damage to the vat film or a failed print. The steps outlined below have been summarised in the ‘Setting up your first print’ video on the Magna Resource Hub.
NOTE: For each of the following steps, Photocentric recommends using gloves and wearing a lab coat and safety goggles.
1. Ensure that your Liquid Crystal Magna is positioned on a stable, level surface where it will not be subject to movement or vibrations during the printing process.
2. Ensure that the print platform is completely clean and dry, failure to do so may result in damage to your vat film or a failed print.
3. Load the print platform onto the print arm and tighten fully by turning the knob in a clockwise direction. Apply pressure on either side to ensure itis fixed in place.
4. Ensure that the resin vat is completely clean and dry to avoid print failures or damage.
5. Check the vat film for signs of damage or wear, if you have any doubt about the condition of the vat film, refer to Section 10.1.
WARNING: If resin or debris enters one or more of the 4 resin detection sensors, a continuous, beeping noise will sound. Instructions to clean the LCD screen protector and resin leak sensors can be found in the Troubleshooting section of the Magna Resource Hub.
6. Ensure the Blow-Peel Gasket is in place flush on the screen and not obscuring the Blow-Peel holes.
7. Place the vat flush onto the Blow-Peel gasket, then clamp the 4x vat clamps onto the vat secure the vat using the four vat clamps.
8. On the Maintain screen, go to the “Pump” feature.Follow the on-screen instructions and ensure the Blow-Peel is working effectively.
Preparing resin for printing
Before printing, it is important to heat the correctly selected resin to a sufficient temperature to improve printing quality. Shaking the resin before it’s poured into the vat ensures pigments and other constituents of the resin are evenly dispersed.
1. Pick the selected resin bottle and loosen the cap to allow air to enter the bottle. Heat the resin inaccordance with the resin TDS.
2. Once suitably heated, tighten the cap of the bottle and shake the resin in the container for 2 minutes.
3. Add the required resin volume reported on Photocentric Studio in addition to the 1.5l minimum level of the resin vat.
4. After the resin has been added and the vat and the print platform are in place, close the door of the printer. The icon at the top right corner of the GUI should show a green closed door when the switch is engaged.
NOTE: Correctly selected resin is based on the resin profile selected in Photocentric Studio. If correct resin is not used, the print will fail.
5. On the ‘Main’ screen, select ‘Print Files’.
6. Select the desired file and press ‘Print’.
WARNING: Do not open the printer door during the printing process.
7. Your Liquid Crystal Magna will start the printing process.
8. During the print, the touchscreen will display various information including:
•Time Elapsed
•Time Remaining
•Total Time
•Print Progress Bar & Image
NOTE: If your printer is connected to your network (see Connecting to a Network), you can monitor print progress via your web browser.


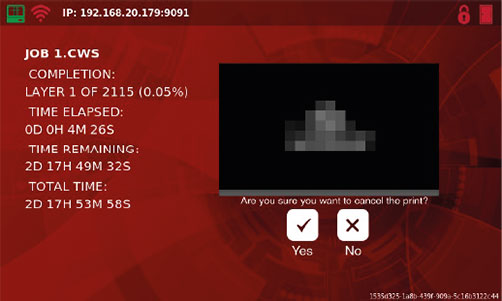
At any time during the printing process, you can pause or cancel the print by making the relevant selection.
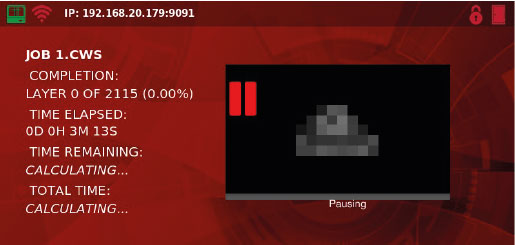
Pausing prints
NOTE: Do not pause the print unless absolutely necessary. If needed, only pause for a short time to avoid discrepancies in printing and ensure both the resin vat and print platform are not removed during this time.
NOTE: Once the cancel/resume options are displayed, the door can be opened. If opened sooner, the door and interlock could be damaged, and the print will be aborted with no option to resume.
Wait for the layer to finish exposing. Once paused, the option will be given to cancel or resume the print.
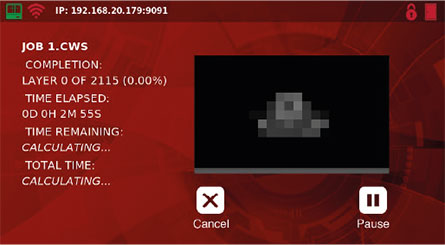
Select ‘Pause’ from the GUI.
Cancelling prints
Once the current layer is complete, the print will stop, and the print arm will return to its homing location. Wait for all movement to cease before opening the door of the printer.

Select ‘Cancel’ from the GUI.
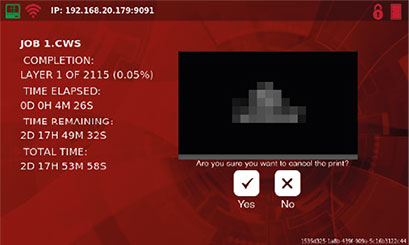
Confirm your choice by selecting the green tick.
9. Liquid Crystal Magna does not need monitoring or supervision during the printing process, you do not need to be present when the print is due to finish.
10. Leaving a finished print inside the printer for a time will allow excess resin to drip back into the vat.
11. When you are ready to clean the print, open the door. Refer to the Cleaning prints section for further guidance.
Cleaning Prints
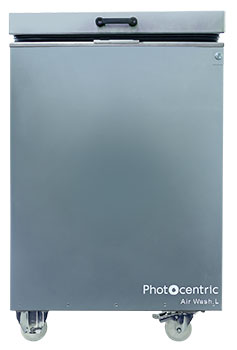
To remove residual resin from printed parts and platforms, they will need to be cleaned. Photocentric recommends using the Photocentric Air Wash L.
1. Free the platform by turning the knob in an anti-clockwise direction.
NOTE: Handle printed parts with care as they are more fragile before post-exposure and avoid unnecessary exposure to light.
2. Grip the handles of the print platform securely and gently pull towards you to remove it.
NOTE: After removing the print platform from the printer, it can be helpful to tilt it and hold it over the vat to drain the excess resin. When carrying a finished print to your cleaning station, use paper towel or a suitable tray to catch any drips.
WARNING: Do not take printed parts off from the platform prior to the cleaning and post-curing steps. If removed, it may affect the dimensional accuracy of parts.
3. Place the platform into the Air Wash L using the specifically designed attachment.
4. Please refer to Photocentric Resin/Resin Cleaner TDS for guidelines on wash cycle time recommendations.
5. Parts can be cleaned in 15 minutes using Photocentric Resin Cleaner or alternatively, in 10 minutes using Photocentric Resin Cleaner 30. Refer to Resin TDS for recommended cleaning cycles.
6. Once the print has been washed, rinse using water to remove excess resin and solvent. For Photocentric Resin Cleaner, rinse using hot water. For Photocentric Resin Cleaner 30, rinse using warm water.
7. Photocentric highly recommends using compressed air to dry parts thoroughly. Alternatively, leave rinsed parts aside to dry.
NOTE: Please refer to Finsihing Prints for guidance on curing printed parts.
The cleaning process is imperative for the quality of surface finish and texture after post exposure. For further information on safe disposal of saturated resin cleaner and guidance on cleaning the wash unit, please refer to the Air Wash L User Manual.
WARNING: Wear gloves and safety glasses when working with Photocentric Resin Cleaners.
Finishing Prints
All parts produced using Liquid Crystal Magna will need to be finished using UV light and heat to fully cure the resin and achieve the correct material properties. Photocentric recommends using the Photocentric Cure L2. Please refer to specific resin TDS information for guidelines on post exposure timings here.
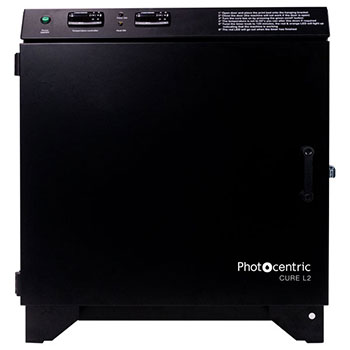
Cure L2
External dimensions are: 700 (W) x 600 (D) x 700 (H) mm.
Internal dimensions are: 500 (W) x 350 (D) x 550 (H) mm.
Parts should be cured on the platform to maintain dimensional accuracy. The user manual for the Cure L2 can be downloaded from the support page below.
Here you can browse guidance on the following:
– Using your cure unit
– Programs
– Maintenance
– Environmental Operating Conditions
1. Switch on the Cure L2 using the power switch at the front.
2. Please refer to resin TDS for guidelines on time recommendations for curing
3. Set the desired temperature and allow the Cure L2 to reach the desired temperature.
4. Slot the print platform into the Cure L2 with parts facing down, ensuring that the handles slot into the attachment.
5. Press and hold the ‘Start’ button (up arrow). The timer will beep once the time has elapsed.
6. Remove the platform from the Cure L2.
WARNING: Wear gloves when handling printed parts prior to finishing. Handle the parts with care.
Removing parts from the print platform
To remove parts from the print platform, Photocentric recommends submerging the hot print platform into cold water (thermal shocking) or manually removing parts via cutting or scraping. The chosen method will depend on the compatibility of the resin, accessibility of supports, and contact area of the part to the platform.
WARNING: The print platform will be hot to the touch after the curing process. It is important to wear heat-resistant gloves when removing the platform from the cure unit.
Thermal Shocking
1. Upon removing platforms from the cure unit, immediately submerge fully in cold water.
2. Parts will become free from the print platform.
Manually Removing Parts
If the printed resin is not compatible for thermal shocking, use cutters to remove the supports from the part. Alternatively, use the provided scraper to remove supports from the feet.
After the parts have been removed from the print platform, fully remove the supports from the part.
Resources
Further Support