Centro risorse Liquid Crystal
Indice
Guida introduttiva a Titan
Cosa riceverai
Stampante Titan


Scatola degli accessori

| 1) Raschietto per impieghi gravosi | 11) Rubinetto di scarico da 100 mm | 21) Guarnizione del serbatoio |
| 2) Lama di ricambio per raschietto per impieghi gravosi | 12) Flacone spray da 750 ml | 22) Guarnizione Blowpeel |
| 3) Cacciavite PH2 | 13) 2 confezioni da 5 kg di resina Titan Hard nera | 23) Vite a testa bombata con impronta a croce M4 x 8 in acciaio inossidabile |
| 4) Cacciavite PH3 | 14) Set di frese (rimozione del supporto) | 24) Vite a testa bombata con impronta a croce M4 x 8 in acciaio inossidabile |
| 5) Chiave del vano elettrico | 15) Seghetto per metalli | 25) Chiavetta USB 3.0 da 64 GB |
| 6) Imbuto in resina | 16) Lama di ricambio per seghetto Junior | 26) Chiave di licenzaPhotocentric |
| 7) Filtro a carta da 400 micron | 17) Raccordo per aria | 27) Cavo di alimentazione |
| 8) Antenna Wi-Fi | 18) Coltello da sverniciatura / raschietto per impieghi gravosi | 28) Ausilio per il sollevamento di bidoni |
| 9) Guanti grandi x100 | 19) Confezione di pipette e tamponi | 29) Aiuto per la personalizzazione dell'interfaccia di Vat |
| 10) Occhiali di protezione | 20) Morsetti per tubi (set da 2) |
Scatola degli accessori
1) Raschietto per impieghi gravosi
2) Lama di ricambio per raschietto per impieghi gravosi
3) Cacciavite PH2
4) Cacciavite PH3
5) Chiave per vano elettrico
6) Imbuto
7) Filtro a carta da 400 micron
8) Antenna Wi-Fi
9) Guanti grandi x100
10) Occhiali di sicurezza
11) Rubinetto di estrazione da 100 mm
12) Flacone spray da 750 ml
13) 5 kg di Titan Hard
14) Set di taglierini
15) Seghetto junior
16) Lama di ricambio per seghetto Junior
17) Raccordo per aria
18) Coltello/raschietto per lavori pesanti da 2"
19) Confezione di pipette e tamponi
20) Morsetti per tubi (set da 2)
21) Guarnizione per vasca
22) Guarnizione Blowpeel
23) Vite a testa cilindrica con impronta a croce M4 x 8 in acciaio inossidabile
24) Vite a testa cilindrica con impronta a croce M4 x 8 in acciaio inossidabile
25) Chiavetta USB da 64 GB 3.0
26) Chiave di licenza Photocentric
27) Cavo di alimentazione
28) Ausilio per il sollevamento della vasca
29) Ausilio per il rifacimento del rivestimento della vasca
Preparativi prima di ricevere la stampante
Luce ambientale
Titan utilizza resine che polimerizzano se esposte alla luce nella parte blu dello spettro (in particolare a 460 nm). La resina è sensibile alla luce visibile, in particolare alla luce solare. Utilizza la stampante in un ambiente con illuminazione soffusa o con luce rossa. Evita sempre l'esposizione diretta alla luce solare. Se possibile, riduci l'intensità luminosa durante la manipolazione della resina
Spazio/ubicazione
Titan pesa 635 kg e deve essere posizionato su una superficie piana, liscia e rigida, con i piedini inseriti e livellati (per ulteriori informazioni su come livellarlo, consultare la sezione "Installazione di Titan").
Una volta posizionato Titan, è necessario misurarne il livello di rumore, che può variare a seconda della posizione o degli oggetti circostanti. In genere, valori superiori a 80 dB richiedono l'uso di protezioni acustiche in caso di esposizione prolungata. È necessario attenersi alle normative locali in materia di livelli di rumore.
Quando si sceglie una postazione adeguata, assicurarsi che vi sia spazio sufficiente e tenere conto del flusso di lavoro tra Titan, Wash XL e Cure XL.
Si raccomanda di mantenere la temperatura dell'ambiente tra i 20 e i 25 °C e di conservare le resine in un ambiente con condizioni simili.
Le dimensioni esterne del Titan sono 2140 x 1540 x 620 mm. Nella scelta di una posizione adeguata occorre tenere conto anche delle seguenti informazioni:
- La larghezza della porta principale è di 1180 mm, con un'apertura minima richiesta di 90 gradi. L'apertura massima è di 180 gradi.
- La larghezza dello sportello del vano della resina è di 700 mm, con un'apertura minima richiesta di 90 gradi. L'apertura massima è di 180 gradi.
- È necessario uno spazio libero di almeno 400 mm per la presa d'aria della ventola.
- È necessario uno spazio libero di almeno 200 mm per i collegamenti elettrici, quelli dell'aria e l'antenna Wi-Fi.
Se si installano più macchine Titan in una configurazione a farm, si consiglia di inclinarle di 30 gradi e di distanziarle di 2,2 m l'una dall'altra (Figura 7). Ciò consente l'accesso alla camera di stampa e al sistema di dosaggio della resina, oltre a garantire lo spazio necessario per l'aspirazione e lo scarico dell'aria di raffreddamento, occupando il minimo spazio a pavimento.
Assicurati sempre che la base di Titan sia libera da ostacoli.

Estrazione
Titan dispone di due prese di estrazione, una nella parte superiore e una a sinistra, dotate di piastre di copertura. È necessario utilizzare una sola presa di estrazione alla volta. Le piastre di copertura sono fissate con 4 viti. Nella confezione degli accessori è incluso un raccordo da 100 mm. È possibile montarlo una volta rimossa la piastra di copertura e riutilizzare le quattro viti per fissare il raccordo, il che consentirà di collegare un condotto da 4 pollici (100 mm) alla stampante.

Si raccomanda l'uso di un sistema di aspirazione qualora Titan venga utilizzata in uno spazio ristretto o scarsamente ventilato. Il volume d'aria all'interno della stampante è di circa 1600 litri (1,6 m³). È necessario garantire un ricambio d'aria massimo di 0,4 ricambi al minuto. Ciò corrisponde a una portata di 640 litri al minuto o 38 m³ all'ora.
L'utilizzo di una portata maggiore durante un processo di stampa può causare un raffreddamento eccessivo della resina, compromettendo le prestazioni di stampa.
Nei casi in cui sia necessario utilizzare una portata di aspirazione più elevata, la maggior parte dei fumi può essere rimossa dal Titan in pochi minuti. Al termine di ogni stampa, attivare l'aspirazione per un breve periodo prima di aprire lo sportello della stampante.
Photocentric il sistema di estrazione BOFA Pro4 (Photocentric.pdf) da collegare a Titan.
Potenza
- Stampante LC Titan Alimentazione elettrica: 230 V CA/32 A con presa a 3 poli (L+N+E) conforme alle norme IEC 309, EN 60309-1/2 e BS4343.
- Il Titan, quando è collegato a una rete elettrica a 230 V CA, ha un consumo energetico di 3,4 kW senza riscaldatore della resina e assorbe una corrente totale di 14,70 A. Con il riscaldatore della resina collegato, consuma 3,7 kW e assorbe una corrente totale di 16 A. Il consumo energetico medio è di 1,1 kW e di 0,2 kW in modalità di riposo (senza riscaldatore). Con il riscaldatore, il consumo medio di potenza sarà di 1,4 kW e di 0,5 kW al minimo.
- Collegare Titan alla presa utilizzando il cavo di alimentazione in dotazione.
- La presa di alimentazione della stampante si trova sul retro dell'apparecchio, accanto a un sezionatore. Quando si collega la stampante alla presa di corrente, assicurarsi che il sezionatore sia in posizione "off" finché tutti i collegamenti non sono stati effettuati correttamente. Allo stesso modo, spegnere sempre il sezionatore prima di scollegare la stampante dalla presa di corrente.
- La stampante si accenderà automaticamente quando si aziona l'interruttore di isolamento.

Trasformatore
Per il flusso di lavoro completo Titan, inclusi Wash XL e Cure XL, da selezionare in base ai requisiti riportati di seguito: Collegamento al trasformatore
-
- Tensione di uscita: 400-415 V trifase
- Frequenza: 50/60 Hz
- Configurazione di uscita: trifase a 4 fili in configurazione a stella
![]()
- Corrente di uscita a 400 V: 42,5 A
- Corrente di uscita /fase a 230 V: 16 A

Batteria UPS
Per Titan, la selezione dovrà avvenire esclusivamente in base ai seguenti requisiti:
- Tensione di uscita: 230 V
- Frequenza: 50/60 Hz
- Potenza erogata in modo continuo: 3,7 kW
- Requisiti di capacità: per consentire alla stampante di funzionare per 1 ora alimentata dall'UPS, si consiglia una capacità minima di accumulo di energia elettrica pari a 1,5 kWh; per periodi più lunghi, la capacità di accumulo di energia deve essere dimensionata di conseguenza.
Riscaldatore per serbatoio in resina:
- È possibile installare sulla stampante un riscaldatore opzionale da 300 W per mantenere la temperatura della resina in ambienti più freddi.
Collegamenti
- Titan dispone di una porta USB 3.0 sul pannello frontale, sotto l'interfaccia grafica, e di due sul pannello posteriore: una nella parte superiore e una accanto alla presa di alimentazione. La porta USB posteriore in alto è destinata all'antenna Wi-Fi (in dotazione).
- Si prega di utilizzare esclusivamente l'antenna Wi-Fi in dotazione.
- Titan dispone inoltre di una presa di rete RJ45 sul retro, nel caso in cui sia necessaria una connessione di rete via cavo.
- La porta USB situata sulla parte anteriore della stampante consente di caricare i file di stampa tramite una chiavetta USB.

Aria
- È necessaria un'alimentazione continua di aria compressa (tramite un impianto centralizzato o un compressore autonomo) con un tubo di diametro esterno di 10 mm.
- La pressione dell'aria consigliata è di 6 bar (9 psi), con un minimo di 2 bar (8 psi) di aria compressa.
- La portata d'aria consigliata è di almeno 60 l/min.
Alimentazione esterna della resina (opzionale)
Se è necessario utilizzare più di 15 kg (volume massimo del serbatoio interno di resina del Titan), è possibile collegare il Titan a un contenitore esterno di resina di volume maggiore tramite i punti di accesso.

Compressore d'aria
Affinché Titan funzioni, è indispensabile disporre di un'alimentazione di aria compressa con le seguenti caratteristiche:
(compressore autonomo o alimentazione dall'impianto di aria compressa centralizzato dell'edificio)
- pressione: 3 bar (43,5 psi)
- pressione: 8 bar (116 psi)
- flusso d'aria continuo: 80 l/min (2,83 cfm)
- Esempio di compressore: Hyundai HY7524 (1 hp, 24 l, senza olio, 5,2 CFM, 118 psi max)
Compressore d'aria portatile Hyundai 750 W, 24 l, senza olio, a bassa rumorosità, 5,2 CFM, 118 psi, trasmissione diretta | HY7524X
ATTENZIONE!
Un'alimentazione d'aria instabile può danneggiare lo schermo all'interno della stampante a causa di una forza di distacco eccessiva.
Installazione di Titan
Disimballaggio di Titan
Strumenti necessari per disimballare Titan
- Un carrello elevatore in grado di sollevare 1000 kg.
- Cacciaviti Torx 20 e 30
- Chiave a brugola da 12 mm
Durante lo scarico del Titan è necessario indossare occhiali protettivi, scarpe antinfortunistiche e guanti. Il Titan pesa 635 kg e la cassa 200 kg, per un peso totale di 835 kg. Sono necessari due operatori e lo scarico del Titan può avvenire solo tramite carrello elevatore.
- Inizia svitando i bulloni a testa Torx situati nella parte superiore dei pannelli anteriore e posteriore con un cacciavite con punta T30. Quindi rimuovi con cautela il pannello superiore prima di proseguire.
- Rimuovere i dispositivi di fissaggio con testa Torx dei pannelli laterali e metterli da parte.
- Rimuovere i dispositivi di fissaggio con testa Torx dalla base del pannello frontale e metterli da parte.
- Infine, svitare i bulloni a testa Torx dalla base per rimuovere il pannello posteriore.
Rimuovere Titan dal pallet
Sganciare il telaio dalle staffe in acciaio.
- Per prima cosa, svita le 5 viti della staffa in acciaio fissata al pallet.
- Quindi, svitare le quattro viti contrassegnate dello sportello del filtro della ventola con un cacciavite T20.
- Rimuovere le due viti M14 utilizzando una chiave a brugola da 12 mm.
- Procedere allo stesso modo per l'altro lato, aprendo lo sportello del vano della resina e svitando le due viti M14.
- Lascia le viti e la staffa sul pallet e riponile.

Quattro viti del portello del filtro dell'aria che devono essere rimosse

Rimozione delle viti M14

Località Forks
- Sollevare la stampante solo dalla parte posteriore.
- Regolare la distanza tra le forche in modo che entrambe entrino tra i piedi in corrispondenza delle indicazioni segnate.
- Assicurarsi che le forche siano posizionate completamente sotto la stampante prima di sollevarla.
In questo modo, il peso viene distribuito sulle parti strutturali del telaio della stampante. - Si consiglia di riporre l'imballaggio della stampante in un luogo sicuro e asciutto.
Manovre del Titan
Dopo aver posizionato Titan nel punto desiderato, se è necessario avvicinarla ulteriormente, si consiglia di utilizzare le rotelle della stampante.
Assicurarsi che i piedini regolabili siano completamente retratti prima di spostare la stampante sulle rotelle. Estenderli nuovamente fino a toccare il pavimento, nella nuova posizione della stampante.
In altri casi, utilizzare un transpallet o un carrello elevatore per carichi pesanti, con una portata di 1 tonnellata o superiore. Se si utilizza un carrello elevatore o un transpallet, far scorrere le forche sotto la parte anteriore, posizionandole all'interno delle ruote, e spingerle fino in fondo alla parte posteriore della stampante prima di sollevarla.
NOTA:
Un sollevamento errato della Titan potrebbe causare gravi danni a parti funzionali e fondamentali della macchina.
– Se la stampante viene trasportata per una certa distanza con un carrello elevatore, fissarla alle forche utilizzando cinghie a cricchetto per evitare che si muova o rimbalzi sulle forche.
– È possibile utilizzare pezzi di tappetino in gomma per proteggere la stampante da eventuali danni causati dalle forche.
Messa a livello della stampante
Titan è dotata di una livella a bolla posizionata nell'angolo anteriore sinistro della camera interna. La stampante è correttamente livellata quando la bolla si trova al centro della croce e all'interno del cerchio interno.
Titan poggia su ruote dotate di piedini regolabili che possono essere abbassati e regolati per livellare la stampante. Si consiglia di livellare la stampante il più possibile, in modo che il livello della resina rimanga parallelo alla superficie superiore della vasca. È possibile regolare i piedini in altezza tirando la leva, scegliendo la direzione e ruotando la leva verso sinistra o verso destra.

Posizione del livello Titan Sprint

La bolla si trova al centro della croce e all'interno del primo cerchio

Ruotare il cricchetto per regolare i piedini
Configurazione di Titan per la prima stampa
Verifica dei collegamenti
Titan dovrebbe ora essere posizionato correttamente ed essere pronto per l'uso.
Il collegamento alla rete elettrica e all'alimentazione dell'aria deve essere effettuato da personale qualificato.
1. Aprire lo sportello ed estrarre la scatola degli accessori, il tubo di pellicola di ricambio e la scatola delle resine.
2. Collegamento del cavo di alimentazione
2.1. Collegamento della stampante all'alimentazione
Prendere il cavo di alimentazione, allineare la spina alla presa sul retro e inserirla. Ruotare la spina in senso orario fino a quando non scatta in posizione, assicurandosi che sia collegata saldamente. Collegare l'altra estremità del cavo di alimentazione a una presa a muro o a una fonte di alimentazione adeguata.
2.2. Scollegamento della stampante dall'alimentazione
Scollegare sempre prima il cavo di alimentazione dalla presa a muro o dalla fonte di alimentazione, quindi tirare indietro il fermo sulla spina collegata alla stampante. Ruotare la spina in senso antiorario per sganciarla dalla presa di alimentazione.
3. Collegare il tubo da 10 mm per l'alimentazione dell'aria alla stampante Titan utilizzando l'adattatore contenuto nella confezione degli accessori. È necessario seguire le corrette procedure di gestione dei cavi, assicurandosi che i cavi di alimentazione e i tubi dell'aria compressa siano tenuti lontani dai passaggi pedonali, in modo da eliminare o ridurre il rischio di inciampare.
Connessione al Wi-Fi
1. Preparare la stampante per la connessione a Internet procedendo come segue:
-
- Wi-Fi – Inserire la chiavetta Wi-Fi in dotazione nella presa sul pannello posteriore.
- Ethernet – Collegare un'estremità del cavo Ethernet alla presa sul retro e l'altra estremità alla rete locale.
- Accendere la stampante ruotando l'interruttore di sezionamento.
- Se hai intenzione di collegarti al Wi-Fi, vai su Impostazioni e poi su Rete.
- Seleziona la tua rete Wi-Fi.
- Premi "Connetti".
- Digita la password e connettiti.
Dovresti vedere un indirizzo IP elencato sotto la voce Wi-Fi con lo stato "Connesso".
- Chiudi lo sportello della stampante.
- Selezionare "Manutenzione" e poi "Procedure di calibrazione" nell'interfaccia grafica.
- Selezionare la piattaforma di riferimento e attendere che il braccio della stampante raggiunga la posizione di riferimento nella parte superiore.
- Una volta completato il movimento, aprire lo sportello della stampante e rimuovere i blocchi di schiuma.
- Rimuovere la pellicola protettiva dallo schermo della GUI.

L'interfaccia grafica utente (GUI)
Home
Schermata iniziale all'accensione della stampante, che consente di accedere ai vari menu e include un indicatore di pronto e una lista di controllo.
Durante la stampa, questa pagina mostra lo stato di avanzamento e lo stato del lavoro di stampa in corso
Andamento e stato del processo di stampa
mostra il tempo trascorso, il tempo rimanente e le opzioni Annulla e Pausa.
Per garantire che la stampante si connetta, carichi i file e stampi correttamente, si consiglia di riavviarla una volta alla settimana.
Esplora file
Mostra i file disponibili memorizzati sulla stampante, tra cui:
Lavori di stampa
mostra i file disponibili per la stampa, caricati online o tramite trasferimento USB offline.
Timelapse
Raccoglie una serie di immagini, una per ogni livello della stampa completa, accessibili al termine del processo di stampa. I video time-lapse possono essere scaricati sia online che offline. I time-lapse sono dati molto utili nel caso in cui sia necessario analizzare un errore di stampa o utilizzarli per campagne di marketing.
Comandi
Procedure di calibrazione
Offre funzioni che consentono di controllare e gestire le caratteristiche della stampante. Si raccomanda che tali funzioni siano utilizzate da personale qualificato o con il suo supporto.
Gestione dei materiali
Calibrazione del sensore di livello del serbatoio su «0» o sulla soglia con regolazione del livello desiderato.
Diretta
È possibile visualizzare le immagini delle telecamere in diretta dall'interfaccia grafica o tramite accesso remoto.
Impostazioni
Rete
Fornisce informazioni sullo stato della connessione di rete, sia tramite cavo Ethernet che tramite chiavetta Wi-Fi, insieme ai dettagli relativi alla connessione.
Nome host
Consente di aggiornare il nome host della stampante. Al posto degli spazi, inserisci «–» per garantire che funzioni al primo tentativo. Una volta aggiornato il nome host, è necessario spegnere e riaccendere la stampante per garantire il corretto funzionamento dell'hardware e delle connessioni di accesso remoto.
Il nome host può essere utilizzato quando si accede alla stampante tramite una rete locale.
Aggiornamento
Mostra la versione corrente di Crystalliser in esecuzione sulla stampante e consente di aggiornare il software della stampante utilizzando il file di aggiornamento (.swu).
Intensità di carbonio
È possibile inserire i valori di intensità di carbonio della stampante per poter calcolare l'impronta di carbonio di ogni pezzo/lavoro di stampa prodotto
Informazioni sul dispositivo
Fornisce informazioni sulla stampante
Registri
Consente di accedere ai file di log generati dalla stampante, da utilizzare per l'eventuale individuazione dei guasti o il debug.


Come esportare i file di log?
Nell'interfaccia grafica, clicca sull'icona "Impostazioni", quindi seleziona "Registri" e infine "Esporta registro di sistema": il file verrà salvato nella cartella "File di stampa".
Scaricalo tramite "Accesso remoto" utilizzando il nome host o l'indirizzo IP e salvalo sul PC per condividerlo con il team di assistenza tecnica o con i tecnici per un'analisi. (photocentric)
Notifiche
Mostra i messaggi relativi agli eventi recenti verificatisi sulla stampante.
Interfaccia utente remota
Se collegata alla rete locale tramite Wi-Fi o Ethernet, è possibile accedere alla stampante da remoto (solo dalla rete locale). L'interfaccia utente remota è una replica identica dell'interfaccia utente del touch screen, ma non consente l'accesso alla lista di controllo di preparazione e alle procedure di calibrazione. Trattandosi di funzioni fondamentali, l'utente deve trovarsi accanto alla stampante per potervi accedere prima di avviare la stampa successiva.
È possibile accedere all'interfaccia utente remota da un dispositivo connesso alla stessa rete della stampante tramite un browser web, digitando nella barra degli indirizzi il nome host della stampante seguito da «./» oppure il suo indirizzo IP (ad esempio «nome-host-stampante./» o «192.168.1.1»)
Regolazione del flusso d'aria e della pressione
- Le giuste impostazioni dell'aria sono fondamentali per le prestazioni di stampa della Titan e per il suo corretto funzionamento.
- Collegare il raccordo rapido per l'aria alla stampante fornita nella confezione degli accessori.
- Collegare il tubo dell'aria alla stampante. Se si utilizza un compressore, accenderlo. Altrimenti, assicurarsi che l'alimentazione dell'aria principale sia attiva.
- Aprire lo sportello di manutenzione situato nella parte posteriore della stampante. Aprire completamente il regolatore di flusso fino a 11 unità. Regolare il regolatore di pressione su 0,15-0,2 MPa, come indicato dall'indicatore in plastica verde.

Inizializzare o ricalibrare il sensore della resina dopo averlo scollegato o sostituito
- Per la prima stampa o dopo aver scollegato il sensore della resina, è necessario calibrarlo su «0».
Assicurarsi che il sensore di livello sia pulito: utilizzare alcol isopropilico e un fazzoletto di carta per rimuovere eventuali residui. - Per calibrare il sensore della resina, vai su «Controlli > Gestione materiali >» e, accanto al livello attuale visualizzato, premi su «Zero-0».
Stampa con Titan
Preparazione dei file per la stampa
- Importa i modelli 3D in Photocentric o Voxel Dance Additive.
- Per i file di dimensioni superiori a 3 GB, consigliamo di prepararli con Voxel Dance Additive.
- Seleziona il profilo della macchina Liquid Crystal .
- Preparare il modello aggiungendo i supporti, ecc.
- In Photocentric , seleziona la resina desiderata e lo spessore dello strato desiderato. Quindi esegui il taglio in formato *crs.
- In Voxel Dance Additive, esegui il taglio con lo spessore di strato desiderato. Importa quindi il file risultante in Crystalliser PFP, seleziona Titan e la resina desiderata per generare il file *crs.
- Per ulteriori informazioni su Photocentric Studio Pro, visita questa pagina.
- Per ulteriori informazioni su Voxel Dance Additive, visita questa pagina.
Preparazione alla stampa
- Assicurarsi di utilizzare i DPI adeguati durante la manipolazione di resine o il contatto con superfici su cui è presente della resina. Sono stati forniti guanti e occhiali di protezione; si raccomanda inoltre di indossare un camice da laboratorio o una tuta.
- Assicurarsi che i piedini siano bloccati e che il piano di stampa sia in posizione orizzontale rispetto alla forza di gravità. Le stampe possono richiedere fino a 90 ore per essere completate, quindi assicurarsi che la stampante disponga delle risorse di resina necessarie nel serbatoio per l'intera durata di ogni stampa.
- Se si utilizza una nuova piattaforma per la prima volta, è opportuno carteggiarla leggermente con carta abrasiva a grana 60 per aumentarne la rugosità superficiale e migliorare l'adesione. È necessario indossare una mascherina FFP3 ed eseguire la carteggiatura in un locale ben ventilato o, se necessario, con un sistema di aspirazione.
- La quantità di resina necessaria per la stampa è indicata nei software Photocentric e Voxel Dance. Inoltre, è necessario aggiungere al valore indicato almeno 3 litri di resina nel serbatoio. Ciò serve a coprire completamente la vasca della resina ed evitare il fallimento della stampa.
- La capacità massima del serbatoio della resina Titan è di 15 litri. Versare la resina nel serbatoio.
- Se è necessaria una quantità maggiore di resina, è possibile aggiungere manualmente altri 8 litri nella vasca fino a quando il sensore di livello indica il 40%.
- È possibile che al Titan si possa agganciare anche un contenitore di resina più capiente.
- Assicurarsi che rimanga spazio sufficiente nel contenitore quando si svuota la vasca tramite la funzione automatica «Svuota vasca».
- Per alcune Photocentric , come la HighTemp DL401, è necessario riscaldare la resina a 60 °C prima della stampa. Per mantenere la resina calda durante la stampa, collegare il tappetino riscaldante fornito con Titan e impostare la temperatura a 70 °C.
- Verificare che la piattaforma pulita sia in posizione e fissata saldamente.
- Quando si posiziona la piattaforma di stampa sul braccio, assicurarsi che i due morsetti terminali di fissaggio siano completamente chiusi. Assicurarsi inoltre che lo spazio tra il morsetto e l'area fissata sia privo di detriti o ostacoli.
- Verifica che la pellicola protettiva sia pulita e integra.
- Sopra i canali di ventilazione sono presenti alcune nervature, che fanno parte del progetto, e non è necessario tagliarle.
- Verificare che la guarnizione Blow-Peel sia integra e al suo posto. Il segno bianco sopra la pellicola protettiva indica la posizione della guarnizione Blow-Peel.
- Verificare che la vasca sia pulita e in buone condizioni e che sia fissata saldamente, quindi chiudere lo sportello.
- Controllare che la pellicola della vasca non presenti segni di danneggiamento o usura. In caso di dubbi sulle condizioni della pellicola della vasca, consultare la sezione dedicata alla manutenzione.
- Se lo si desidera, nella schermata «Routine di calibrazione» eseguire il «Test del ciclo di gonfiaggio-sgonfiaggio» e verificare se la pellicola della vasca si gonfia e torna piatta quando viene sottoposta al vuoto.
- Assicurarsi che il sensore della resina sia installato sul gruppo di riempimento automatico della resina e che sia collegato.
- Se necessario, eseguire le procedure di "Inizializzazione" e "Calibrazione" del sensore della resina dall'interfaccia utente.
- Il sistema di riempimento automatico manterrà costante il livello della resina nella vasca per tutta la durata della stampa.
- L'icona sull'interfaccia grafica dovrebbe mostrare il simbolo di una porta chiusa a chiave per indicare che la porta è chiusa.
- Controllare la direzione del tubo di riempimento automatico della resina installato sopra la pompa. Dovrebbe corrispondere a quanto mostrato nella foto qui sotto:

12. Prima di ogni stampa, nell'interfaccia grafica della stampante viene visualizzata una lista di controllo che guida l'utente attraverso tutte le fasi di preparazione. Una volta completata la lista di controllo, la stampante passa allo stato"Pronta"ed è pronta per iniziare a stampare.
(se si aprono gli sportelli, è necessario ripetere la procedura)
13. Nell'interfaccia grafica, seleziona "Stampa file" e scegli il file appena segmentato che desideri stampare.
Avvio del processo di stampa
Utilizzo della funzione di riempimento automatico con la resina
Prima della stampa, è importante agitare la resina nel flacone prima di versarla nel serbatoio della resina o nel sistema di gestione.
Versare la resina manualmente
Prima della stampa, è importante agitare la resina nel flacone prima di versarla nel sistema di gestione della resina. È possibile versare la resina direttamente nella vasca, ma non riempirla oltre gli 8 litri.
Messa in pausa di una stampa
Non mettere in pausa la stampa se non è necessario. Se necessario, mettere in pausa solo per un breve periodo per evitare imperfezioni nella stampa e assicurarsi che né la vasca della resina né la piattaforma di stampa vengano rimosse durante questo intervallo.
- Quando si preme "Pausa", il sistema attende il completamento dell'esposizione dello strato, quindi mette in pausa il processo e sblocca lo sportello.
Annullamento di una stampa
Una volta completato il livello corrente, se hai annullato una stampa, questa si interromperà e il braccio di stampa tornerà alla posizione iniziale. Attendi che tutti i movimenti si siano arrestati prima di aprire lo sportello della stampante.
Arresto di emergenza durante una stampa
In caso di emergenza, i pulsanti di arresto di emergenza si trovano sulla parte anteriore della macchina e all'interno della camera di stampa.
Arresto di emergenza (E-Stop)
In caso di emergenza, i pulsanti di arresto di emergenza si trovano sulla parte anteriore della macchina e all'interno della camera di stampa.

- Se si preme il pulsante di arresto di emergenza (e-stop) durante una stampa, questa si interromperà immediatamente, l'esposizione dello strato corrente verrà interrotta e tutti i movimenti cesseranno.
- Quando viene attivato l'arresto di emergenza, la macchina rimane sotto tensione. Il sistema di movimento lineare e la serie di luci non funzionano, ma l'interfaccia grafica sì. Il sistema di movimento lineare è dotato di un sistema frenante che impedisce la caduta del braccio di stampa.
- Se in caso di emergenza è necessario scollegare la stampante, spegnere prima l'interruttore di isolamento, purché sia sicuro farlo. Se ciò non è possibile, interrompere l'alimentazione della presa a cui è collegata la stampante, purché sia sicuro farlo.
- Prima di spostare la stampante, assicurarsi che sia stata scollegata dalla rete elettrica in modo sicuro e che sia stata scollegata dall'alimentazione dell'aria da una persona qualificata.
- Per disattivare l'arresto di emergenza attivato, è sufficiente ruotare il pulsante in senso antiorario dopo essersi assicurati che la stampante sia accesa e che non sussistano rischi per la sicurezza.
- Se durante la stampa viene premuto il pulsante di arresto di emergenza, purtroppo non è possibile riprendere la stampa.
Una volta terminata la stampa
Titan non richiede monitoraggio né supervisione durante il processo di stampa; non è necessario essere presenti al momento del completamento della stampa.
Lasciando la stampa finita all'interno della stampante per un po' di tempo, la resina in eccesso colerà nuovamente nella vasca. Quando si è pronti a pulire la stampa, aprire lo sportello. Per ulteriori indicazioni, consultare la sezione "Pulizia delle stampe".
Svuotamento della resina dalla vasca
Assicurarsi di indossare indumenti protettivi, come una tuta da lavoro, durante la manipolazione della resina. Controllare il livello nel contenitore della resina per verificare che vi sia spazio sufficiente prima di svuotarlo. Lo svuotamento della vasca può essere interrotto in qualsiasi momento per cambiare contenitore, se necessario.
- Selezionare la procedura "Svuotamento serbatoio" nella sezione "Procedure di calibrazione".
- Il sistema di gestione della resina inizierà a pompare la resina fuori dalla vasca. È importante monitorare il livello della resina nel contenitore e interrompere il processo se è pieno.
- Quando nel bacino rimane circa il 20% del contenuto, allentare i morsetti per inclinare il bacino verso sinistra e posizionare un piccolo blocco per raschiare e spostare il materiale verso l'ugello. Utilizzare il "dispositivo di sollevamento del bacino" fornito nella confezione degli accessori per mantenere il bacino inclinato.
- Quando non fuoriesce più resina, utilizzare dei fogli di carta assorbente e una piccola quantità di solvente detergente adatto per pulire i residui di resina presenti nella vasca.
Prima di rimuovere la vasca, ricordati di smontare il gruppo sensore di riempimento automatico della resina e di riporlo avvitandolo nel vassoio di raccolta della resina in dotazione.
Rimozione del serbatoio dalla stampante
Se si rimuove il serbatoio dalla stampante, è necessario seguire le corrette tecniche di movimentazione manuale.
- Rimuovi eventuali gocce di resina presenti all'esterno della vasca con della carta assorbente.
- Posizionare la vasca su una superficie pulita e liscia adatta (ad es. un tappetino in schiuma per la pulizia delle vasche).
- Usa della carta assorbente per assorbire gli ultimi residui di resina presenti nella vasca.
- Utilizzare una piccola quantità di solvente detergente adatto insieme a un tovagliolo di carta per pulire la pellicola e le pareti della vasca. Asciugarle accuratamente.
- Verificare che non vi siano frammenti di resina indurita rimasti sulla pellicola della vasca e rimuoverli con cautela utilizzando la spatola morbida in dotazione.
- Pulire accuratamente l'esterno della vasca e controllare che la pellicola non presenti segni di danneggiamento o usura; in caso di dubbi sulle condizioni della pellicola della vasca, consultare la sezione "Sostituzione della pellicola della vasca" riportata di seguito. La stampa con una vasca danneggiata causerà malfunzionamenti e perdite, provocando danni permanenti alla stampante.
- Controlla lo schermo del tuo Liquid Crystal per verificare che non presenti segni di contaminazione da resina o danni.
- Se si nota la presenza di resina, pulire accuratamente con un tovagliolo di carta: questo è un segnale che molto probabilmente è necessario sostituire la pellicola sul serbatoio della resina. Se si ritiene che lo schermo della stampante possa essere danneggiato, contattare il proprio fornitore o consultare le pagine di assistenza sul Photocentric . Riporre il serbatoio della resina all'interno della stampante quando non viene utilizzato.
Pulizia delle stampe
Per rimuovere i residui di resina dai pezzi stampati e dalle piattaforme, è necessario pulirli. Photocentric di utilizzare il Photocentric XL.
Una volta completata la stampa, è consigliabile lasciare la piattaforma sopra la vasca per qualche minuto, in modo che la resina in eccesso possa defluire.
Quando si rimuove la piattaforma dalla stampante, è necessario indossare occhiali protettivi, guanti e scarpe antinfortunistiche.
Maneggiare con cura i pezzi stampati, poiché sono più fragili prima del trattamento post-esposizione, ed evitare un'esposizione non necessaria alla luce.
Non rimuovere i pezzi stampati dalla piattaforma prima delle fasi di pulizia e post-polimerizzazione. La loro rimozione potrebbe compromettere la precisione dimensionale dei pezzi.
- Sollevare i bracci del «Platform Handler» in modo che possano scorrere facilmente tra la piattaforma di stampa e il braccio di stampa, come illustrato di seguito.
- Spingere il "Platform Handler" in avanti contro la parte anteriore della macchina, posizionando le forche tra il braccio di stampa e la piattaforma, come illustrato.
- Sollevare le forcelle in modo che la piattaforma di stampa poggi su di esse.
- Sbloccare la piattaforma allentando i due morsetti situati nella parte anteriore del braccio di stampa.
- Tirare indietro il "Platform Handler" allontanandolo dall'LC Titan in modo da rimuovere la piattaforma di stampa dalla stampante.
- Se possibile, abbassare l'altezza delle forche del «Platform Handler» a un livello tale da non danneggiare il pezzo, ma da abbassare il baricentro complessivo del dispositivo di sollevamento e della piattaforma di carico
- Inserire il "Platform Handler" e la piattaforma nel Wash XL e bloccare la piattaforma in posizione utilizzando l'attacco appositamente progettato.
- Rimuovere lentamente il dispositivo di sollevamento, assicurandosi che la piattaforma sia fissata correttamente prima di chiudere lo sportello e avviare il ciclo di post-trattamento.
- I componenti devono essere lavati utilizzando il solvente Photocentric Cleaner nell'unità Wash XL.
- Selezionare il ciclo "Lavaggio" sull'interfaccia grafica di Wash XL e spruzzare i componenti con la pistola a solvente per 5-15 minuti. Far ruotare i componenti utilizzando il pedale. A seconda della complessità dei componenti, il ciclo di lavaggio potrebbe durare più a lungo di 5-15 minuti,
- Una volta lavata la stampa, selezionare «Risciacquo» utilizzando acqua per rimuovere la resina e il solvente in eccesso per 3 minuti.
- Utilizzare la pistola ad aria compressa per asciugare accuratamente i componenti.
- Il processo di pulizia è fondamentale per garantire la qualità della finitura superficiale e della struttura dopo l'esposizione. Per ulteriori informazioni sullo smaltimento in sicurezza del detergente a base di resina satura e per indicazioni sulla pulizia dell'unità di lavaggio, consultare il Manuale d'uso di Wash XL.

Essiccazione delle stampe
Tutti i pezzi realizzati con Titan devono essere sottoposti a post-polimerizzazione mediante luce UV e calore per garantire la completa polimerizzazione della resina e ottenere le proprietà desiderate del materiale. Photocentric utilizzare il Photocentric XL. Per le linee guida relative alla post-polimerizzazione, consultare le schede tecniche (TDS) delle singole resine.
- Sollevare il "Platform Handler" in modo che le forche possano scorrere agevolmente tra la piattaforma di stampa e l'unità di lavaggio. Durante l'utilizzo del dispositivo di trasferimento della piattaforma è necessario indossare scarpe antiscivolo
- Spingere in avanti la piattaforma di trasferimento contro la parte anteriore della macchina, posizionando le forche tra il braccio di stampa e la staffa.
- Sganciare la piattaforma rilasciando il fermo d'angolo sul lato destro della staffa.
Maneggiare con cura i pezzi stampati poiché sono più fragili prima della post-polimerizzazione ed evitare un'esposizione alla luce non necessaria.
-Non rimuovere i pezzi stampati dalla piattaforma prima delle fasi di pulizia e post-polimerizzazione. La rimozione potrebbe compromettere la precisione dimensionale dei pezzi. - Tirare il dispositivo di sollevamento all'indietro, allontanandolo dal Wash XL, in modo da staccare la piattaforma di stampa.
Se possibile, abbassare l'altezza di trasferimento della piattaforma a un livello tale da non danneggiare il pezzo, ma da abbassare il baricentro complessivo del dispositivo di sollevamento e della piattaforma di stampa - Inserire la piattaforma di trasferimento nel Cure XL e bloccarla in posizione utilizzando la staffa angolare appositamente progettata.
- Rimuovere con cautela il supporto di trasferimento, assicurandosi che la piattaforma sia fissata correttamente prima di chiudere lo sportello e avviare il Cure XL.
- Si prega di consultare la scheda tecnica della resina per le indicazioni relative ai tempi di indurimento consigliati
- Impostare la temperatura desiderata e attendere che Cure XL raggiunga tale temperatura.
- Selezionare il ciclo "Asciugatura" e impostare la durata desiderata per garantire che l'acqua in eccesso venga eliminata prima di avviare il ciclo "Indurimento"
- Selezionare "Polimerizzazione" e impostare la durata del ciclo desiderata seguendo le istruzioni del TDS della resina.
- Rimuovere la piattaforma dal Cure XL utilizzando il "Platform Handler".
Indossare guanti quando si maneggiano i pezzi stampati prima della finitura. Maneggiare i pezzi con cura. Dopo il processo di polimerizzazione, la piattaforma di stampa sarà calda al tatto. È importante indossare guanti resistenti al calore quando si rimuove la piattaforma dall'unità di polimerizzazione.
Rimozione di componenti dalla piattaforma
Quando si rimuovono i pezzi dalla piattaforma, è necessario indossare occhiali protettivi e guanti. Per rimuovere i pezzi dalla piattaforma di stampa, Photocentric procedere manualmente, tagliandoli o raschiandoli con gli accessori forniti con la stampante.
- Seghetto e frese per rimuovere i supporti dai pezzi o dal piano di stampa
- Raschietti per pulire la piattaforma e rimuovere i supporti e la resina indurita dalla piattaforma
Dopo aver rimosso i pezzi dalla piattaforma di stampa, rimuovere completamente i supporti dal pezzo ed eseguire le operazioni di finitura necessarie in base al tipo di pezzo stampato (levigatura, incollaggio, verniciatura ecc.).
Preparazione per la prossima stampa
Piattaforma
Pulizia della piattaforma
Una volta rimosse le parti stampate, è fondamentale pulire accuratamente la piattaforma di stampa prima di riutilizzarla.
- Se sulla piattaforma di stampa sono rimasti residui di detergente Photocentric o di resina, rimuoverli con uno spray a base di IPA e un tovagliolo di carta.
- La resina indurita deve essere rimossa dalla piattaforma utilizzando il raschietto in dotazione. La presenza di sbavature o imperfezioni visibili sulla piattaforma indica che è necessario levigarla. La levigatura deve essere minima per evitare di danneggiare la superficie della piattaforma e comprometterne il parallelismo rispetto allo schermo. Photocentric utilizzare carta abrasiva a grana 60.
- Assicurarsi che non rimangano residui di resina indurita nelle fessure della piattaforma, poiché ciò potrebbe compromettere le stampe successive.
- Se possibile, utilizzare aria compressa per rimuovere i residui dalla piattaforma, in modo da evitare di forare la pellicola della vasca per le stampe successive.
- Quando non viene utilizzata, la piattaforma deve essere riposta all'interno della stampante.
IVA
Per avviare le prossime stampe, assicurati che la vasca della resina sia pulita e che la pellicola protettiva sia in buone condizioni; in alternativa, con la resina ancora nella vasca, controlla l'area della pellicola/schermo utilizzando una spatola.
Inoltre, se la guarnizione "Blow-Peel" ha perso la sua elasticità, sostituiscila con una nuova.
Se è necessario sostituire la pellicola del serbatoio,
Rinnovare l'aspetto della vasca
In condizioni di funzionamento normale, è consigliabile sostituire la pellicola e la guarnizione della vasca della resina dopo circa 20 stampe. È necessario sostituire immediatamente la pellicola in caso di danni visibili o segni evidenti di perdite di resina. La sostituzione della pellicola richiede circa 40 minuti, purché si segua la procedura corretta e si utilizzino gli strumenti adeguati. È importante pulire accuratamente il corpo della vasca per evitare che frammenti di resina indurita o altri agenti contaminanti danneggino la pellicola appena installata.
Ti serviranno:
- Tappetino in schiuma per la pulizia della vasca
- Asciugamano di carta
- Solventi detergenti (ad es. alcool isopropilico)
- Raschiatore
- 1 confezione di pellicola per vasca
- 1 guarnizione per serbatoio
- Cacciavite PH2
- Cacciavite PH3
Segui questo link al video per scoprire come sostituire la pellicola della vasca Sostituzione della pellicola del vasca
È possibile picchiettare delicatamente sulla pellicola della vasca con la punta delle dita (non con l'unghia) per verificarne la tensione. Si dovrebbe sentire un suono acuto e risonante, simile a quello di un piccolo tamburo. Se la pellicola risulta allentata, la vasca non funzionerà correttamente.
Dichiarazione di conformità
LIQUID CRYSTAL
Modello: Liquid Crystal
Con la presente dichiariamo che il prodotto sopra indicato è conforme ai requisiti essenziali delle seguenti norme:
La documentazione tecnica è conservata presso la sede del produttore indicata di seguito
Data di emissione: 18 maggio 2024
Luogo di emissione: Peterborough
Regista: Paul Holt
Produttore: Photocentric
Titan House, Titan Drive, Peterborough, PE1 5XN, Regno Unito
Anno di marcatura CE: 2024
![]()
Informazioni sulla sicurezza
Si prega di leggere attentamente le istruzioni, conservare il presente documento per riferimento futuro e seguire tutte le avvertenze e le istruzioni riportate sul prodotto.
- Titan pesa circa 635 kg. Assicurati di avere a disposizione un carrello elevatore per estrarre Titan dalla sua cassa.
- L'ingombro di Titan è di 1,1 x 1,4 m; assicurati di disporre di una superficie piana e stabile in grado di sostenere il peso e l'ingombro di Titan.
- L'altezza di Titan è di 2,2 m. Si consiglia uno spazio con un'altezza di 2,5 m per garantire un utilizzo confortevole.
- Questa stampante 3D è collegata alla rete elettrica con un'alimentazione di 240 V CA, 50/60 Hz.
- Il consumo energetico medio del Titan senza l'opzione riscaldatore è di 1,04 kW, mentre il picco è di 3,38 kW con un assorbimento di 14,1 A a 240 V CA.
Il consumo energetico medio del Titan con l'opzione riscaldatore è di 1,4 kW, mentre il picco è di 7 kW con un assorbimento di 16 A a 240 V CA - Collegare prima il cavo di alimentazione alla stampante, quindi inserire la spina nella presa di corrente.
- Scollegare il cavo di alimentazione dalla presa di corrente prima di scollegarlo dalla stampante.
- Non utilizzare all'aperto.
- Evitare che la resina o altri liquidi penetrino all'interno del telaio; asciugare immediatamente eventuali versamenti di liquido.
- Scollegare la stampante dalla rete elettrica se non viene utilizzata per un lungo periodo.
- Non appoggiare alcun oggetto sul cavo di alimentazione. Non collocare questo prodotto in un punto in cui qualcuno possa calpestare il cavo, a meno che non si utilizzi una copertura per cavi.
- Se si utilizza una prolunga con questo prodotto, assicurarsi che l'assorbimento totale delle apparecchiature collegate alla prolunga non superi la portata di corrente della stessa. Inoltre, assicurarsi che l'assorbimento totale di tutti i prodotti collegati alla presa a muro non superi la portata del fusibile.
- Non sovraccaricare una presa di corrente, un interruttore o una presa collegando troppi dispositivi.
- Utilizzare il prodotto esclusivamente con il cavo di alimentazione in dotazione.
- In caso di malfunzionamento, scollegare immediatamente la stampante dalla presa di corrente.
- Non tentare di riparare questo prodotto da solo, poiché l'apertura o la rimozione dei coperchi potrebbe esporti a punti di tensione pericolosi o ad altri rischi. Affida tutte le riparazioni a personale di assistenza qualificato. Invia un'e-mail al tuo fornitore nazionale o contatta l'assistenza tecnica all'indirizzo: photocentric
Scollegare il prodotto dalla presa di corrente e rivolgersi a personale di assistenza qualificato se:
-
- Il cavo di alimentazione o la spina sono danneggiati, tagliati o sfilacciati.
- È stato versato del liquido all'interno della macchina.
- L'apparecchio è stato esposto alla pioggia o all'acqua.
- La macchina è caduta, oppure la cassa è stata danneggiata.
- La macchina non funziona correttamente nonostante siano state seguite le istruzioni per l'uso.
- La resina è irritante per la pelle e gli occhi. Indossare sempre i guanti quando si entra in contatto con la resina liquida. Utilizzare sempre il prodotto in un locale ben ventilato. In casi eccezionali, alcune persone potrebbero sviluppare una sensibilità alla resina e manifestare irritazioni cutanee o eruzioni cutanee. Per evitare questo rischio, indossare sempre i guanti ed evitare di respirare i fumi.
- Si consiglia di collegare Titan all'unità di aspirazione attraverso il foro presente sul pannello superiore o su quelli laterali, utilizzando il raccordo di aspirazione in dotazione.
- La stampante deve essere utilizzata su una superficie stabile e piana, preferibilmente al riparo dalla luce solare diretta. È preferibile un'illuminazione ambientale di colore rosso per evitare un'indurimento indesiderato.
- In nessun caso l'utente deve entrare completamente all'interno della stampante.
Parti ausiliarie
Elementi di supporto e di orientamento
L'orientamento e la struttura di supporto ottimali per un pezzo dipendono da diversi fattori, in primo luogo dalla sua geometria, ma anche dal tipo di resina e dalla superficie che si desidera mantenere priva di segni lasciati dai supporti. In Photocentric sono disponibili linee guida consolidate su come orientare e supportare pezzi con geometrie diverse.
In qualità di Photocentric , puoi contare sul nostro team di esperti in progettazione per la produzione additiva, pronto ad aiutarti a ottimizzare il tuo processo di produzione.
Se desideri ottimizzare la tua produzione digitale su larga scala, contatta gli esperti.
Le informazioni sull'assistenza di The Studio sono disponibili qui.
Linee guida di progettazione
Elementi di supporto e di orientamento
Se progetti un componente tenendo conto delle modalità di stampa su Titan, otterrai componenti più funzionali e avrai maggiori possibilità di successo nella stampa. Queste sono solo indicazioni sui limiti entro i quali dovresti operare durante la progettazione.
Le diverse geometrie generano condizioni di forza diverse al momento del distacco. Titan è dotato della tecnologia brevettata Blow-Peel e di una pellicola per vasca a bassa adesione che garantiscono un'affidabilità e prestazioni di stampa eccezionali. Si consiglia di ridurre al minimo la superficie per fetta per evitare variazioni significative e improvvise della superficie da uno strato all'altro.
I pezzi stampati sulla piattaforma manterranno una maggiore precisione fino alla rimozione dei supporti. I materiali flessibili hanno una resistenza iniziale inferiore e devono essere progettati in modo da risultare più resistenti.
Tutte le misure dipendono dalla resina: se la resistenza a freddo è elevata, è possibile ridurre questi valori; se la flessibilità è elevata, è necessario aumentarli. È possibile verificare i parametri di progettazione nella scheda tecnica (TDS) della resina; inoltre, abbiamo preparato per voi una sintesi qui.
In caso di dubbi, non esitate a contattarci: offriamo ai nostri clienti una consulenza gratuita in materia di progettazione.
Pareti portanti
Le pareti di supporto sono collegate ad altre pareti e devono avere uno spessore minimo di 0,5 mm per le resine rigide, durevoli o flessibili, al fine di evitare deformazioni. Aggiungere 0,2 mm di spessore per ogni aumento di 10 mm delle dimensioni. Se 10×10=0,5, allora 100×100=2,3 mm
Pareti non portanti
Le pareti non supportate non sono collegate ad altre strutture e devono avere uno spessore minimo di 0,5 mm se si utilizzano resine rigide, durevoli o flessibili, per evitare deformazioni. Aggiungere 0,25 mm di spessore ogni 10 mm di aumento delle dimensioni. Se 10×10=0,5, allora 100×100=2,75 mm.
Sporgenze e stramazzi
Per "sbalzo" si intende qualsiasi parte di un modello 3D che si estende verso l'esterno in orizzontale o ad angolo, senza essere sostenuta dagli strati sottostanti. Gli sbalzi possono rappresentare una sfida durante la stampa perché, in assenza di un supporto adeguato, possono incurvarsi o cedere a causa della forza di gravità durante il processo di stampa. Stampare con un angolo di 45° rispetto all'orizzontale riduce le forze di sollevamento. Gli sbalzi che si estendono con angoli inferiori a 45 gradi rispetto all'asse verticale sono generalmente più facili da stampare senza supporti aggiuntivi; se sono più alti di 100 mm, allora aggiungi dei supporti.
Elementi incisi
I dettagli incisi sono elementi incassati nel modello. Sono richieste una profondità e una larghezza minime di 0,8 mm. Devono essere sufficientemente profondi e larghi da non confondersi con il disegno circostante.
Ponti orizzontali
Un ponte orizzontale è la distanza tra due strutture verticali. Se il ponte supera i 3 mm, potrebbe rompersi durante la stampa oppure deformarsi e staccarsi dalla piattaforma.
Fori orizzontali
I fori orizzontali sono quelli il cui asse è parallelo al piano XY. Il diametro minimo dei fori deve essere di 1 mm per le resine rigide o resistenti e di 3 mm per le resine flessibili. I fori con diametro superiore a 5 mm devono essere rinforzati per evitare che si deformino.
Fori verticali
I fori verticali sono fori il cui asse è parallelo all'asse Z. Il diametro minimo dei fori è di 0,8 mm per le resine Rigid e Durable e di 1 mm per le resine Flexible, ma la profondità non deve superare i 5 mm. I fori devono essere progettati con un diametro maggiore di 0,15-0,2 mm.
Parti di collegamento e mobili
Il gioco è la distanza necessaria tra due parti mobili di un modello, ad esempio tra ingranaggi o giunti. Le parti devono essere stampate separatamente e assemblate dopo la polimerizzazione. Per le resine rigide o durevoli, da 0,15 mm a 0,2 mm per un accoppiamento stretto e 0,4 mm per un accoppiamento largo; per le resine flessibili, da 0,5 mm a 1 mm per un accoppiamento stretto e 2 mm se le parti devono muoversi verso l'interno e l'esterno (questo può variare a seconda della forma e dello spessore della parte).
Fori di drenaggio
Quando un modello è cavo, è fondamentale aggiungere dei fori di drenaggio per consentire alla resina di fuoriuscire durante e dopo il processo di stampa ed evitare l'effetto "cupping". Si raccomanda un diametro minimo di 5 mm per i fori e un foro ogni 16 centimetri cubi di parte cava.
Spessore massimo della parete
Lo spessore delle pareti del modello deve essere limitato a un massimo di 10 mm. Spessori delle pareti eccessivi possono causare la formazione di sedimenti. In tal caso, il tempo di attesa deve essere regolato manualmente a 15 secondi se il pezzo non è più spesso di 50 mm, oppure a 30 secondi se il pezzo è più spesso di 50 mm.
Spessore minimo della parete
Per i modelli rigidi o resistenti, lo spessore minimo delle pareti dei pezzi cavi è di 2 mm, mentre per quelli flessibili è di 3 mm. È necessario aggiungere un riempimento interno. I pezzi piatti di grandi dimensioni potrebbero richiedere l'aggiunta di nervature o reticoli per evitare deformazioni.
Diametro del perno
Un perno deve avere una lunghezza superiore al doppio della sua larghezza. Con uno spessore di 0,8 mm è possibile stampare perni alti fino a 10 mm che rimangano dritti. Il diametro minimo dei perni per le resine Rigid o Durable è di 0,5 mm; aumentare lo spessore di 0,25 mm ogni 10 mm. Per le resine Flexible è di 0,7 mm; aumentare lo spessore di 0,35 mm ogni 10 mm.
Manutenzione di Titan
Programma di manutenzione
Compito |
Frequenza |
| Controllare la piattaforma di stampa | Prima di ogni stampa |
| Controllare la pellicola protettiva dello schermo LCD | Prima di ogni stampa |
| Ispezionare la pellicola del serbatoio | Prima di ogni stampa |
| Verifica del funzionamento della funzione "Blow-Peel" | Settimanale |
| Verifica il funzionamento dei LED e dello schermo LCD | Settimanale |
| Pulire la piattaforma | Dopo ogni stampa |
| Controllare il livello nel serbatoio della resina | Prima di ogni stampa |
| Filtro per serbatoio e ugello | Ogni mese, se si utilizza costantemente un serbatoio |
| Sostituire la pellicola della vasca | Circa 30 stampe* |
| Piattaforma pulita | Dopo ogni stampa |
| Pulire il filtro della ventola | Mensile |
| Controllare la coppia dei bulloni del carrello dell'asse Z | Ogni sei mesi |
| Controllare che le viti a ricircolo di sfere e le guide non presentino segni di ossidazione | Ogni sei mesi |
| Sostituire la pellicola protettiva dello schermo LCD | Ogni 6 mesi* o in caso di danni |
| Riconfigurazione dell'asse Z o del piano di stampa | Solo su indicazione del team di assistenza |
| Pulizia di matrici LED, vetri e ventole | Ogni 3-6 mesi, a seconda delle condizioni ambientali della stanza |
* Potrebbe essere necessario sostituirlo prima del previsto se presenta graffi eccessivi.
Piattaforma
Pulizia della piattaforma
Una volta rimosse le parti stampate, è fondamentale pulire accuratamente la piattaforma di stampa prima di riutilizzarla.
1. Se sulla piattaforma di stampa sono rimasti residui di detergente Photocentric o di resina, rimuoverli con un solvente detergente adatto e un panno di carta.
2. La resina indurita deve essere rimossa dalla piattaforma utilizzando il raschietto in dotazione.
La presenza di sbavature o imperfezioni visibili sulla piattaforma indica che è necessario levigarla. La levigatura deve essere minima per evitare di danneggiare la superficie della piattaforma e comprometterne il parallelismo rispetto allo schermo. Photocentric utilizzare carta abrasiva a grana 60.
3. Assicurarsi che non vi siano residui di resina indurita che ostruiscano i fori della piattaforma, poiché ciò comprometterebbe le stampe successive.
4. Se possibile, utilizzare aria compressa per rimuovere i residui dalla piattaforma, in modo da evitare di forare la pellicola della vasca per le stampe successive.
5. Quando non viene utilizzata, la piattaforma deve essere riposta all'interno della stampante.
Piattaforme intercambiabili
Le piattaforme possono essere scambiate tra una stampante e l'altra. Non sono materiali di consumo, ma col tempo sono soggette a usura. Le piattaforme di stampa devono essere levigate con molta attenzione, utilizzando carta abrasiva a grana 60 in modo delicato e uniforme per garantire che rimangano piatte.
Ricalibrazione delle piattaforme
La piattaforma di stampa è stata precalibrata sulla nostra linea di produzione secondo rigorose procedure di controllo qualità. Ciò garantisce che la superficie inferiore della piattaforma di stampa sia parallela allo schermo LCD. La piattaforma non dovrebbe disallinearsi durante l'utilizzo di Liquid Crystal . Tuttavia, il disallineamento può verificarsi se la piattaforma di stampa cade, se alcuni bulloni specifici si allentano, ecc.
Qualora fosse necessaria una ricalibrazione della piattaforma di stampa, si prega di contattare il nostro team di assistenza per ulteriori indicazioni.
Film sul VAT
Rinnovare l'aspetto della vasca
In condizioni di funzionamento normale, è consigliabile sostituire la pellicola e la guarnizione della vasca della resina dopo circa 30 stampe. È necessario sostituire immediatamente la pellicola in caso di danni visibili o segni evidenti di perdite di resina. La sostituzione della pellicola richiede circa 40 minuti, purché si segua la procedura corretta e si utilizzino gli strumenti adeguati. È importante pulire accuratamente il corpo della vasca per evitare che frammenti di resina indurita o altri agenti contaminanti danneggino la pellicola appena installata.
Ti serviranno:
- Tappetino in schiuma per la pulizia della vasca
- Asciugamano di carta
- Solventi detergenti (ad es. alcool isopropilico)
- Raschiatore
- 1 confezione di pellicola per vasca
- 1 guarnizione per serbatoio
- Cacciavite PH2
- Cacciavite PH3
- Trova una superficie pulita e piana su cui lavorare.
- Utilizzare il tappetino in schiuma per la pulizia della vasca in dotazione per coprire la superficie e proteggere la vasca da eventuali danni.
- Pulire accuratamente la vasca per evitare che la resina coli quando viene capovolta.
- Capovolgi la vasca.
- Rimuovere le viti grandi del serbatoio utilizzando il cacciavite PH3 e metterle da parte.
- Rimuovere il gruppo dell'anello della vasca.
- Pulire accuratamente il corpo della vasca, assicurandosi che sulle superfici destinate a venire a contatto con il nuovo film non siano presenti residui di resina indurita o altre impurità.
- Rimuovere le viti del serbatoio utilizzando il cacciavite PH2 e metterle da parte.
- Sollevare l'anello superiore della vasca, rimuovere la pellicola e smaltirla.
- Pulire accuratamente entrambi gli anelli della vasca con carta assorbente e solvente detergente. Sostituire la guarnizione ad ogni cambio della pellicola nella vasca.
- Assicurarsi che il tappetino in schiuma per la pulizia della vasca sia pulito.
- Appoggia l'anello superiore con la parte superiore rivolta verso il basso.
- Prendi una nuova pellicola per vasca dalla confezione e posizionala al centro dell'anello.
- Infine, posizionare l'anello inferiore sulla pellicola con lo smusso rivolto verso il basso, allineando i fori con quelli presenti sull'anello superiore e sulla guarnizione.
- Fissare i due anelli tra loro utilizzando le viti piccole e un cacciavite PH2.
- Tagliare con cura la pellicola in eccesso. Ora il gruppo dell'anello della vasca è pronto per la fase successiva. Le viti dovrebbero perforare la pellicola man mano che si inizia a serrarle. La pellicola deve essere mantenuta sempre tesa. Non deve essere in tensione, ma non devono esserci pieghe. Deve esserci della pellicola in eccesso su tutti i lati degli anelli.
- Praticare con cura dei fori per le viti più grandi del tino utilizzando la punta del cacciavite o della lama.
- Posizionare la nuova guarnizione all'interno del telaio della vasca e assicurarsi che i fori siano allineati.
- Posizionare il gruppo dell'anello della vasca sul telaio della vasca e assicurarsi che i fori siano allineati.
- Fissare il gruppo dell'anello della vasca al corpo della vasca utilizzando le viti più grandi con il cacciavite PH3. Serrare le viti in due fasi. Avvitare tutte le viti senza serrarle completamente. In entrambe le fasi, iniziare dagli angoli, poi passare al centro di ciascun lato. Completare il serraggio delle viti rimanenti a coppie opposte.
- Verificare che il gruppo dell'anello della vasca sia ben appoggiato al corpo della vasca senza lasciare spazi visibili.
- Verificare che la nuova pellicola non abbia subito danni durante il processo di montaggio.
- Il contenitore è stato rinnovato ed è pronto per l'uso.
È possibile picchiettare delicatamente sulla pellicola della vasca con la punta delle dita (non con l'unghia) per verificarne la tensione. Si dovrebbe sentire un suono acuto e risonante, simile a quello di un piccolo tamburo. Se la pellicola risulta allentata, la vasca non funzionerà correttamente.
Controllo o sostituzione dei morsetti del serbatoio
È importante controllare e, se necessario, sostituire i morsetti della vasca. I morsetti della vasca fissano saldamente la vasca, contribuendo a garantire prestazioni di stampa costanti.
Risoluzione dei problemi di Titan
Controllo o sostituzione dei morsetti del serbatoio
È importante controllare e, se necessario, sostituire i morsetti della vasca. I morsetti della vasca fissano saldamente la vasca, contribuendo a garantire prestazioni di stampa costanti.
Calibrazione del sensore a resina
Dopo aver scollegato o sostituito il sensore, sarà necessario calibrarlo sullo zero «0».
Per farlo dall'interfaccia grafica, selezionare «Controlli» per trovare «Gestione materiali» e, nella riga «Livello attuale», premere «Zero».
Resina vuota
Rimozione della resina dalla vasca
Nell'interfaccia grafica della stampante, seleziona "Controlli" per trovare "Routine di calibrazione", quindi premi "Svuota vasca"
Per accelerare il processo, puoi allentare i morsetti e inclinare il lato sinistro utilizzando un gradino stampato o un blocco di legno. Quindi, con una spatola, sposta la resina sul lato destro, dove si trova l'ugello.
Come smaltire la resina liquida
Se la resina è scaduta o contaminata e non è più possibile utilizzarla, verificare e seguire le linee guida delle autorità locali per smaltirla in modo adeguato.
Filtri per ventilatori
Manutenzione del filtro della ventola
Il filtro della ventola deve essere pulito una volta al mese, ma va anche controllato settimanalmente per assicurarsi che non si accumuli polvere durante l'uso. Assicurarsi che la stampante non sia in funzione e che le ventole non siano in funzione al termine della manutenzione del filtro della ventola.
1. Rimuovere la fila superiore di viti dal pannello di accesso al filtro della ventola
2. Aprire il pannello ed estrarre il filtro magnetico dalle staffe di fissaggio.
3. Per pulire il filtro, passare il tubo dell'aspirapolvere sul lato esterno del filtro. Se si aspira il lato interno del filtro, le particelle di polvere più grandi verranno aspirate attraverso il filtro, riducendone la durata.
4. Sostituire il filtro tra i morsetti di fissaggio e chiudere lo sportello di accesso al filtro della ventola. La ventola non deve essere messa in funzione senza che il filtro e lo sportello di accesso al filtro siano correttamente posizionati.
Caricamento file
- Il file sulla chiavetta USB non viene riconosciuto
Per caricare il file da una chiavetta USB, questa deve essere formattata in formato FAT32: è l'unico formato che la stampante è in grado di riconoscere. Non caricare il file da un server, ma salvalo direttamente sul tuo PC. Assicurati che il firewall sia disattivato, poiché potrebbe impedire la connessione. Aggiorna la pagina dell'interfaccia utente per verificare che il file caricato sia presente.
- Modifiche all'indirizzo IP della stampante
Verifica che il router Wi-Fi non sia impostato su un indirizzo IP dinamico, poiché in tal caso alla stampante verrebbe assegnato un nuovo indirizzo IP ogni volta. Prova a collegarti utilizzando questo metodo di trasferimento file online. Assicurati che la stampante e il PC siano collegati alla stessa rete da cui stai estraendo il file e che il file sia salvato localmente sul tuo PC anziché su un server.
Piattaforma
- Ricalibrazione della piattaforma
Se si verifica un errore di stampa e il team Photocentric ti consiglia di ricalibrare la piattaforma, ti sconsigliamo vivamente di procedere alla ricalibrazione se non è necessaria.
- La piattaforma non si muove
Nell'interfaccia grafica, premere "Manutenzione" e poi "Sollevamento piattaforma" per verificare se il motore solleva normalmente la piattaforma. Se si sente un rumore metallico e la piattaforma non si solleva, contattare photocentric.
Interfaccia utente - Blocco della GUI
Controlla l'icona della stampante nell'angolo in alto a sinistra dell'interfaccia grafica: dovrebbe essere di colore verde quando la stampante è abilitata. Se l'icona è rossa, significa che la stampante è disabilitata e non funzionerà. Premi l'icona della stampante per abilitarla. Verifica che la stampante utilizzi il software e il firmware corretti sia sulla scheda PCB che sul Raspberry Pi.
Schermo - Nessuna immagine visualizzata
Se sullo schermo LCD non viene visualizzata alcuna immagine, premere "Manutenzione" nell'interfaccia grafica e poi "Display 4K" per verificare se lo schermo LCD visualizza l'immagine. Se il logo non viene visualizzato, contattare photocentric
Perdita dall'imballaggio
Se noti una piccola perdita dal serbatoio, interrompi immediatamente la stampa per evitare danni alla stampante.
1. Non rimuovere la vasca, poiché ciò causerebbe la fuoriuscita della resina in essa contenuta. Quando si rimuove la vasca, è necessario seguire le corrette tecniche di movimentazione manuale
2. Annullare la stampa e attendere che il blocco venga disattivato. (Simbolo di blocco sbloccato)
3. Accedere alla pagina "Routine di calibrazione" nell'interfaccia grafica e selezionare "Piattaforma di riferimento "
4. Rimuovere la piattaforma dalla stampante.
5. Nella stessa pagina "Procedure di calibrazione", selezionare "Svuota vasca" per rimuovere la resina residua dalla vasca.
6. Utilizzare la spatola in dotazione o una carta di plastica per rimuovere la resina dalla pellicola della vasca e individuare la zona della perdita. Questa operazione deve essere eseguita con delicatezza per evitare ulteriori danni.
7. Rimuovere la vasca e svuotare quanto prima la resina residua utilizzando un filtro.
8. Pulire la vasca come di consueto e pulire anche il fondo della pellicola che riveste la vasca. Se il danno alla pellicola è molto piccolo (1 mm o meno) e non si trova nell'area dello schermo, è possibile sigillarlo applicando del nastro adesivo trasparente sul lato inferiore della pellicola. Se il danno è significativo, sostituire la pellicola che riveste la vasca seguendo le nostre linee guida.
- Pulizia dopo una perdita dalla vasca
Si attiva il sensore di perdita dell'acqua calda
Messaggio di avviso continuo sull'interfaccia grafica quando la stampa è in pausa – controllare i sensori di perdita del serbatoio della resina
Se noti la comparsa di un avviso sull'interfaccia grafica, significa che i sensori di perdita sono stati attivati, il che indica una perdita nella vasca.
Le perdite dal serbatoio si verificano quando la pellicola del serbatoio viene forata o lacerata e la resina penetra al di sotto di essa, raggiungendo la superficie del sensore e il sistema di distacco ad aria. Per evitare danni alla macchina, i sensori attivano la chiusura delle valvole e la stampa viene messa in pausa o annullata. Rimuovere la piattaforma e conservarla al buio. L'utente deve quindi verificare se si è verificata una perdita dal bacino e pulire immediatamente la perdita. Se viene rilevata una lettura errata, la stampa può essere ripresa; tuttavia, possono verificarsi discrepanze nella stampa a causa della pausa, con un aumento della probabilità di difetti proporzionale alla durata della pausa. Guarda il video per imparare a pulire una macchina dopo una perdita dal bacino.
-Se prevedete di dover ricalibrare la piattaforma, contattate: photocentric
In questo modo, prima di confermare questa procedura, verrà effettuata un'ulteriore analisi dei problemi con i relativi controlli.
Segnale acustico continuo – sensori di perdita della vasca della resina
Se si sente un segnale acustico forte e sull'interfaccia grafica compare un avviso di perdita dalla vasca, significa che i sensori di svuotamento si sono attivati, indicando una perdita dalla vasca.
Le perdite dal serbatoio si verificano quando la pellicola del serbatoio viene forata o strappata e la resina penetra al di sotto di essa nel sistema di rimozione a soffio. Per evitare danni alla macchina, i sensori si attivano, facendo scattare un allarme e mettendo in pausa o annullando la stampa. Rimuovere la piattaforma e conservarla al buio. L'utente deve quindi verificare se si è verificata una perdita dal bacino e, in tal caso, pulire immediatamente la perdita. Se si tratta di un falso allarme, la stampa può essere ripresa; tuttavia, potrebbero verificarsi discrepanze nella stampa a causa della pausa, con un aumento della probabilità di difetti proporzionale alla durata della pausa. Guarda il video per imparare come pulire una macchina dopo una perdita dal bacino.
Se è necessario ricalibrare la piattaforma, contattare photocentric
Sbucciatura a soffio
- Il sistema di sbucciatura ad aria non funziona
Controllare che la linea principale di alimentazione dell'aria non presenti perdite o ostruzioni ed eseguire nuovamente il test.
Rimuovere il pannello posteriore e verificare che la valvola dell'aria sia regolata correttamente.
Photocentric
- Chiave di licenza smarrita
In caso di smarrimento della licenza, possiamo ripristinarla a pagamento come segue
- Attivazione della licenza di Studio su un altro sistema
Per trasferire la licenza dello studio su un altro sistema, devi prima disattivarla sul sistema attuale. Apri il software e vai alla scheda "Aiuto". Seleziona l'opzione per rimuovere la licenza dal sistema attuale. Questa operazione disattiverà la licenza su quel computer; per eseguire questa procedura è necessaria una connessione a Internet attiva.
Diagnosi dei difetti di stampa
Crepe
Il motivo principale per cui un modello si rompe è l'elevata densità del riempimento o dei supporti interni. Si consiglia di sostenere il file con supporti esterni, quindi svuotarlo e infine aggiungere il riempimento. Possiamo fornire consigli su una varietà di strutture di riempimento, sia geometriche che organiche, in grado di mantenere la resistenza e ridurre al minimo la massa. È importante non svuotare prima il modello, altrimenti il software genererà automaticamente dei supporti interni che interferiscono con il riempimento. Aggiungere i fori necessari e assicurarsi che le strutture interne a traliccio complesse siano lavate accuratamente, risciacquate e lasciate asciugare per 4 ore prima di inserirle nell'unità di polimerizzazione.
Deformazione
La deformazione è causata da parti non sostenute o orientate correttamente. Per evitare la deformazione di parti con un elevato rapporto di aspetto (ad esempio, pannelli grandi e sottili), utilizzare il software VoxelDance Additive per garantire una solida rete di supporti a reticolo e punte di supporto molto sottili che ne facilitino la rimozione.
Mancata aderenza alla piattaforma
Verificare che i componenti siano posizionati sulla piattaforma nel software. Verificare che la piattaforma sia levigata e che la superficie sia ruvida. Verificare che la resina sia a temperatura ambiente e che sia stato selezionato un tempo di esposizione sufficientemente lungo. Verificare che la piattaforma sia stata riportata correttamente in posizione iniziale.
Delaminazione o striature in una parte
Ciò accade quando i pezzi non aderiscono alla piattaforma o si delaminano a metà del processo di stampa; le cause più comuni sono:
- Le parti non sono a contatto con la piattaforma
- La piattaforma deve essere levigata
- C'è una perdita nella vasca
- Errori nella preparazione dei file: righe mancanti
- Modello cavo senza fori di drenaggio
- Supporti mancanti
- Il sistema di rilascio del foglio di protezione non funziona correttamente
- La guarnizione della vasca non è posizionata correttamente
- Il tino non è fissato con le staffe
- La piattaforma di stampa non è parallela allo schermo LCD: sarà necessario eseguire il re-homing
- Cliente che utilizza la piastra di base su Studio
Piccoli fori
Un “foro” o “taglio” è un difetto di stampa in cui una piccola area del pezzo non si forma. Questo vuoto può presentarsi sotto forma di un piccolo foro, di un tunnel che attraversa il pezzo o di una fessura che lo taglia. Se altre sezioni del pezzo sarebbero state sostenute direttamente dal materiale mancante, anche quelle sezioni potrebbero non polimerizzarsi correttamente. Uno dei seguenti fattori, o una loro combinazione, può causare un foro o un taglio in una stampa:
- Residui sul fondo della vasca
- Una lacuna nel file di stampa
- Il ritiro del materiale sta provocando un cedimento della parete in quel punto
Aspirare o soffiare
Il fenomeno del "cupping" o "blowout" si verifica quando una porzione concava o convessa di un pezzo funge da ventosa e intrappola l'aria durante la stampa. Man mano che la piattaforma di stampa si allontana dal serbatoio durante il processo di distacco, lo spazio vuoto all'interno della cavità aumenta. Ciò riduce la pressione dell'aria all'interno della cavità, creando un differenziale di pressione che spinge verso l'interno sulle pareti circostanti della cavità. Se le pareti sono troppo sottili e non riescono a resistere alla pressione, si deformano verso l'interno per equalizzare la pressione.
Il rischio di deformazione dipende dal tipo di resina, dalle dimensioni della coppa, dalla forma del modello e dallo spessore della parete della coppa. Le coppe di piccole dimensioni o quelle con pareti più spesse potrebbero essere stampate correttamente. Per evitare questo problema, aggiungi un foro di drenaggio e orienta il modello in modo da ridurre al minimo la deformazione.
Diagnosi dei difetti di stampa
Non c'è nulla fissato alla piattaforma
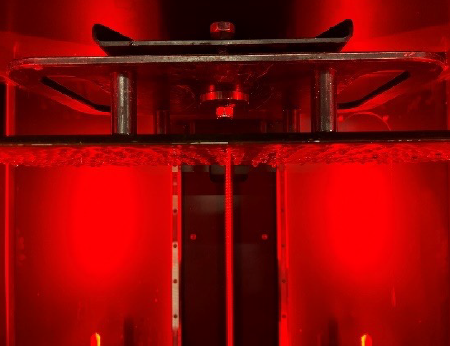
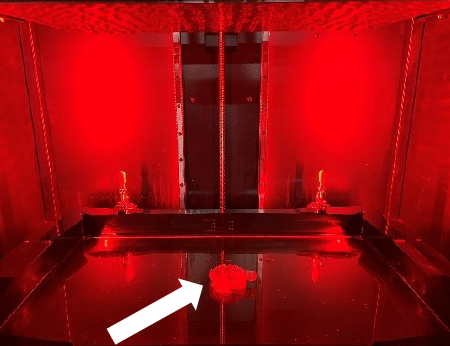
Aspetto:
Non è stato stampato nulla sulla piattaforma e il pezzo rimane immerso nella vasca, sommerso dalla resina.
Cause:
La parte relativa al software è posizionata sopra la piattaforma nel software di slicing.
La piattaforma è troppo liscia o non è posizionata correttamente.
Reazione troppo lenta: resina fredda o tempo di esposizione troppo breve.
Risoluzione dei problemi:
Software - Per verificare che il file inizi all'altezza Z corretta sulla piattaforma, è possibile scorrere visivamente i primi strati spostando il cursore di sezionamento sul lato destro della finestra di anteprima utilizzando i tasti di scelta rapida Pag. Su e Pag. Giù sulla tastiera.

Piattaforma – Se la piattaforma è diventata troppo liscia, potrebbe non aderire più al polimero. Prendi una carta vetrata a grana fine (grana 40) e strofinala con movimenti circolari sulla superficie per creare una rugosità.
Se il posizionamento non è corretto, la stampa potrebbe iniziare sopra lo schermo LCD; in tal caso, eseguire il riposizionamento seguendo queste istruzioni
Reazione troppo lenta: assicurati di aver riscaldato la resina prima di versarla nella vasca, poiché alcuni tipi sono meno reattivi a basse temperature rispetto ad altri. 35 °C è una buona temperatura per avviare una stampa.
Verifica che sia stata selezionata la giusta impostazione della resina per il tipo di materiale che stai utilizzando.
Solo intimo tecnico
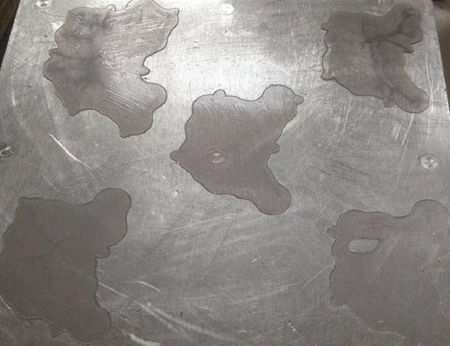
Aspetto:
Sono stati realizzati solo i primi strati di base fissati alla piattaforma; il resto della stampa (freccia) si trova nella vasca.
Cause:
Reazione troppo lenta: la resina è troppo fredda o il tempo di esposizione è troppo breve.
La funzione "Blow Peel" non funziona: la guarnizione del sistema "Blow Peel" è danneggiata e presenta una perdita d'aria.
Risoluzione dei problemi:
Reazione troppo lenta: assicurati di aver riscaldato la resina prima di versarla nella vasca, poiché alcuni tipi di resina sono meno reattivi a basse temperature rispetto ad altri. 35 °C è una buona temperatura per avviare una stampa. Verifica che sia stata selezionata l'impostazione corretta per il tipo di resina che stai utilizzando.
Blow Peel non funziona: verifica eseguendo un test Blow Peel, seguendo le istruzioni del video qui.
Supporta solo
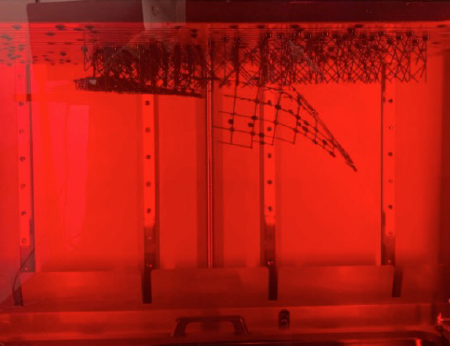
Aspetto:
I supporti vengono realizzati solo con la parte principale immersa nella vasca.
Cause:
È stato selezionato un profilo di supporto errato.
Il diametro della punta di supporto è troppo piccolo.
Indurimento insufficiente causato da un profilo della resina errato
Errore durante la rimozione della pellicola.
Risoluzione dei problemi:
È stato selezionato un profilo di supporto errato: se è troppo stretto o presenta una distribuzione troppo rada, non sarà abbastanza resistente per sostenere il pezzo; consulta qui le nostre linee guida di progettazione
Diametro del supporto troppo piccolo: se è troppo piccolo, non sarà abbastanza resistente per sostenere il pezzo; ogni materiale ha una dimensione minima delle caratteristiche che è in grado di sostenere. Consulta qui le nostre linee guida di progettazione
Polimerizzazione insufficiente causata da un profilo della resina errato: ogni tipo di materiale richiede tempi di esposizione diversi. Se si taglia il file con un profilo errato, il tempo di esposizione potrebbe non essere sufficiente per formare i supporti e il modello risulterà difettoso.
Errore del sistema Blow Peel:verificare eseguendo un test Blow Peel, seguendo le istruzioni del video disponibile qui. Se il sistema Blow Peel smette di funzionare durante il processo di stampa, la forza di distacco potrebbe essere tale da staccare il modello dai supporti. Sull'interfaccia grafica, premere "Maintain" e poi "Pump" per eseguire il test e verificare se l'aria rimane tra la piastra dello schermo e la pellicola della vasca. Se si sgonfia, rimuovere la vasca della resina e controllare che la guarnizione del Blow Peel sia ben appoggiata sullo schermo. Verificare che non ci siano fori nella vasca. Controllare che i tubi dell'aria non presentino collegamenti allentati.
Le interruzioni di foglio avvengono in una fase successiva della stampa
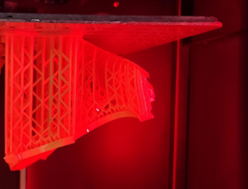
Aspetto:
Il pezzo è perfettamente formato solo fino a un certo punto, il resto della stampa si trova ancora nella vasca.
Cause:
Mancanza di corrente – interruzione di corrente durante la stampa
Errore "Slice mancante nel file - dalla mesh"
Il componente presenta una carenza strutturale: mancano i supporti o l'oggetto stesso
Perdita dalla vasca - la resina si è riversata sotto la vasca
La funzione Blow Peel non funziona – La guarnizione del Blow Peel non è posizionata correttamente
Residui nella vasca – grandi particelle solide presenti nella resina
Risoluzione dei problemi:
Mancanza di corrente: controlla che non si tratti di un'interruzione di corrente, perché la stampante non si riavvia.
Mancanza di una sezione nel file: verifica che il file sia completo e che non vi siano file immagine vuoti in corrispondenza del punto in cui si verifica l'interruzione, scorrendo i livelli in quella zona. Spostando il cursore delle sezioni sul lato destro della finestra di anteprima con i tasti di scelta rapida Pag. Su e Pag. Giù della tastiera, potrai vedere se è presente un file contenente una sezione vuota (ovvero priva di pixel bianchi o con una quantità significativamente ridotta di essi). Se presente, rimuovila o correggila.
Controlla l'elenco delle parti per verificare se è presente un avviso di errore della mesh sulla parte anteriore di una qualsiasi parte. Se ne trovi uno, utilizza gli strumenti di riparazione della mesh per correggere la parte ![]()
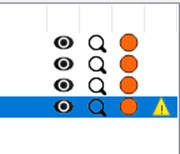
Il pezzo presenta una debolezza strutturale a livello di progettazione: verificare che non vi siano variazioni significative dell'area della sezione trasversale all'altezza in cui la stampa si è interrotta; in caso contrario, riposizionarlo con un'angolazione diversa e rinforzare il supporto.
Perdita dalla vasca: controllare che non ci sia resina sotto la vasca. Se ce n’è, sostituire la pellicola della vasca https://iz0.b72.myftpupload.com/liquid-crystal-magna-resource-hub/
Il sistema "Blow Peel" non funziona: eseguire un test di tenuta dell'aria seguendo le istruzioni del video disponibile qui. Nell'interfaccia grafica (GUI), premere "Manutenzione" e poi "Pompa" per eseguire il test e verificare se l'aria rimane intrappolata tra la piastra dello schermo e la pellicola della vasca. Se l'aria fuoriesce, rimuovere la vasca della resina e controllare che la guarnizione del sistema "Blow Peel" sia posizionata correttamente sullo schermo. Verificare che non vi siano fori nella vasca. Controllare che non vi siano collegamenti allentati nei tubi dell'aria.
Residui nella vasca: la presenza di particelle solide di grandi dimensioni nella vasca può impedire allo strato successivo di iniziare all'altezza corretta. Filtrare la resina e riversarla nella bottiglia, quindi pulire la vasca con IPA. Pulire la piattaforma, assicurandosi che non rimangano particelle solide nei fori o sulla superficie superiore della piattaforma.
Crepa
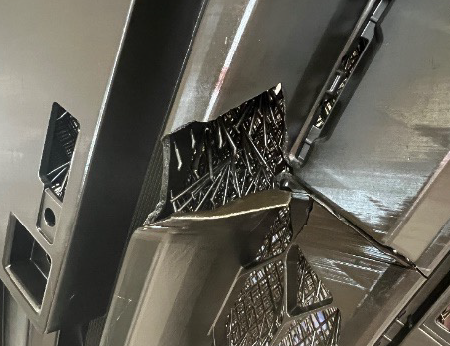
Aspetto:
Le crepe sono delle fratture nel pezzo, che si formano durante la stampa o dopo l'esposizione.
Cause:
Se una massa di grandi dimensioni si contrae in misura maggiore rispetto a una massa più piccola, l'unico modo in cui può neutralizzare la forza è allontanarsi.
Elevata densità di riempimento o di rinforzo interno.
Isole non supportate all'interno di parti cave.
Risoluzione dei problemi:
Una massa di grandi dimensioni si restringe più di una massa più piccola. Evita cambiamenti improvvisi della superficie durante la stampa; se possibile, orienta il pezzo con un angolo di 45 gradi. Crea dei supporti esterni nel file, poi svuotalo e infine aggiungi il riempimento. Non svuotarlo prima, altrimenti il software genererà automaticamente dei supporti interni nei vuoti.
Elevata densità di riempimento o di rinforzo interno – Esistono numerose strutture a traliccio, sia geometriche che organiche, in grado di garantire la resistenza e ridurre al minimo la massa. Aggiungere quindi i fori di drenaggio necessari per garantire che le complesse strutture a traliccio interno possano essere lavate accuratamente. Risciacquare e lasciare asciugare per 4 ore prima di riporre il pezzo nell'unità di polimerizzazione.
Isole non supportate all'interno di parti cave: verificare la presenza di isole all'interno della cavità cliccando su "Mostra isole" (evidenziato) oppure utilizzare la barra di scorrimento per controllare la parte. Se necessario, supportare manualmente le isole.
![]()
Deformazione
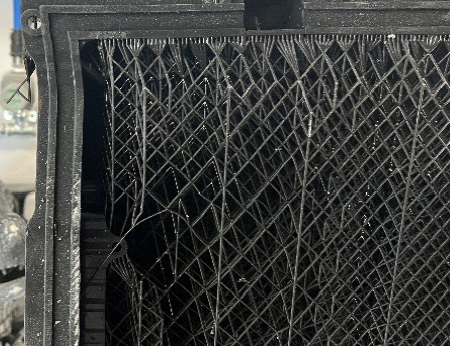
Aspetto:
Il pezzo si è deformato rispetto alla forma prevista.
Cause:
Ciò è dovuto all'effetto cumulativo del restringimento, che si distribuisce in modo non uniforme su tutta la stampa.
Risoluzione dei problemi:
Eliminare le deformazioni in ogni tipo di geometria richiede esperienza, ma è sempre possibile farlo ricorrendo a una combinazione di:
- Posiziona il pezzo sulla piattaforma in modo tale che eventuali variazioni brusche di superficie tra una sezione e l'altra siano attenuate; ciò può comportare il suo posizionamento con un'angolazione diversa rispetto alla verticale.
- Evita che la superficie si deformi durante la stampa.
- Sostituisci gli elementi pieni con una struttura a traliccio: il software VoxelDance Additive garantirà una solida rete di supporto a traliccio, riducendo la massa e quindi il ritiro.
- Utilizzo di una fitta rete di supporti esterni per mantenere il pezzo in posizione durante la stampa.
- Asciugare accuratamente i pezzi prima della lavorazione successiva.
- Lasciare il pezzo con i supporti ancora fissati sulla piattaforma fino al termine della post-elaborazione.
Linea verticale
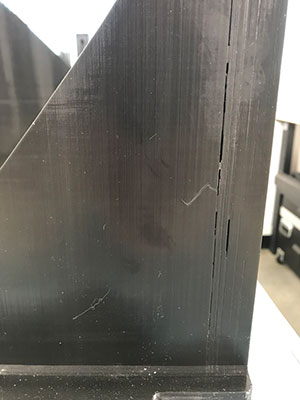
Aspetto:
Linea verticale che percorre l'intero pezzo.
Cause:
Un guasto dello schermo che causa la comparsa di una linea fissa o di un pixel difettoso.
Risoluzione dei problemi:
Guasto dello schermo con linea fissa o pixel bloccato: questi problemi sono causati da forti forze di distacco che, durante la stampa di oggetti piatti e pieni di grandi dimensioni, sollevano lo schermo e danneggiano il cavo a nastro. La causa è la stampa di oggetti pieni di grandi dimensioni (oltre il 30% dell'area dello schermo) orientati orizzontalmente. Per evitarlo in futuro, orientare la parte con un angolo di 45 gradi e svuotarla se l'area piena è superiore a 30x30 mm per i materiali rigidi, o a 80x80 mm per i materiali durevoli.
Linea orizzontale
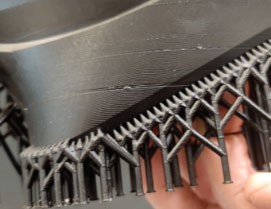
Aspetto:
Il pezzo presenta una linea evidente che non fa parte del disegno. Questa linea può estendersi fino a provocare una rottura sul bordo esterno del pezzo.
Cause:
La presenza di detriti nella vasca fa sì che il pezzo venga posizionato al di sopra del livello corretto durante l'esposizione dello strato successivo.
Nel file di stampa manca una sezione.
Il progetto del componente presenta una grave debolezza strutturale nella sua forma che causa un cedimento strutturale.
La pellicola del vaschetta è troppo lassa e non si stacca completamente dal pezzo durante la rimozione.
Struttura di sostegno fragile, non sufficientemente resistente per sopportare le sollecitazioni durante la costruzione.
Risoluzione dei problemi:
Residui nella vasca: è possibile individuarli risalendo lungo la linea fino all'origine dell'errore, dove dovrebbe trovarsi il frammento di polimero sporgente. Filtrare la resina e riversarla nella bottiglia, quindi pulire la vasca con IPA. Pulire la piattaforma, assicurandosi che non rimangano particelle solide nei fori o sulla superficie superiore della piattaforma.
Mancanza di una sezione nel file: verifica che il file sia completo e che non vi siano file immagine vuoti in corrispondenza del punto in cui si verifica l'interruzione, scorrendo i livelli in quella zona. Spostando il cursore delle sezioni sul lato destro della finestra di anteprima con i tasti di scelta rapida Pag. Su e Pag. Giù della tastiera, potrai vedere se è presente un file contenente una sezione vuota (ovvero priva di pixel bianchi o con una quantità significativamente ridotta di essi). Se presente, rimuovila o correggila.
Controlla l'elenco delle parti per verificare se è presente una notifica di errore della mesh su una qualsiasi parte. Se ce n'è una, utilizza gli strumenti di riparazione della mesh per correggere la parte. ![]()
Il pezzo presenta una grave debolezza strutturale a livello di progettazione: verificare che non vi siano variazioni significative dell'area della sezione trasversale all'altezza della linea. Cambiamenti improvvisi nell'area della superficie creano un ritiro irregolare, con la tensione che viene rilasciata solo dalla separazione del pezzo a quel livello. Per ridurre questo fenomeno, orientare il pezzo a 45 gradi rispetto all'asse xy ed evitare la presenza di grandi sporgenze. Se il pezzo non viene supportato adeguatamente, le aree di grandi dimensioni appena formate si sposteranno causando un disallineamento in quello strato.
La pellicola del bacino è troppo lassa: assicurati che non presenti pieghe visibili e che non sia troppo floscia. Sostituisci la pellicola del bacino ogni 30 stampe per mantenere la corretta tensione della pellicola.
Struttura di supporto insufficiente: assicurati che sia sufficientemente robusta da resistere a qualsiasi movimento durante la rimozione dei supporti e alla forza di gravità. Se il modello presenta un numero insufficiente di supporti o se il diametro dei supporti è inferiore a quello raccomandato, il modello potrebbe muoversi o spostarsi durante la stampa, causando la formazione di linee, lo spostamento degli strati o la delaminazione. Segui le linee guida Photocentric per i supporti qui
Coppettazione
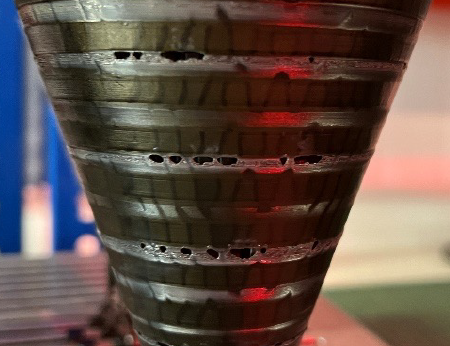
Aspetto:
Il cupping, o "blowout", è un foro nella parete laterale di un oggetto sferico.
Cause:
Il fenomeno del "cupping" si verifica quando una porzione concava o convessa di un pezzo funge da ventosa e intrappola l'aria durante la stampa. Durante la stampa di una cavità, quando la piattaforma di costruzione si allontana dallo schermo durante il processo di distacco, lo spazio vuoto all'interno della cavità aumenta di volume e riduce la pressione al suo interno, spingendo la parete verso l'interno.
Risoluzione dei problemi:
Il fenomeno del "cupping" tende a manifestarsi in modo più evidente con le resine che presentano una bassa resistenza iniziale o una viscosità più elevata. È particolarmente evidente nelle forme perfettamente sferiche, nei modelli di grandi dimensioni a forma di coppa o in quelli con pareti molto sottili.
Per ridurre al minimo la formazione di vuoti d'aria:
- Posizionare il pezzo da stampare con un'inclinazione di 45 gradi.
- Aggiungi un foro di sfiato nella parte inferiore del disegno.
- Aumentare lo spessore della parete.
Consulta qui le linee guida di progettazione consigliate per il tuo specifico materiale e modello di stampante
Formazione di fango
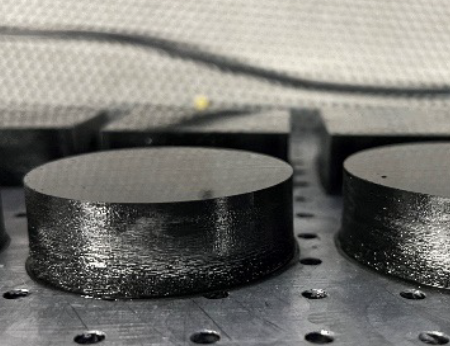
Aspetto:
Sul pezzo è presente della resina indurita in eccesso e nella vasca c'è una pozza di resina indurita ancora morbida.
Cause:
Sovraesposizione della resina dovuta al suo spostamento mentre è ancora in fase di polimerizzazione. Questo fenomeno è particolarmente evidente negli oggetti solidi di grandi dimensioni, superiori a 30x30 mm.
Risoluzione dei problemi:
Ciò è dovuto al fatto che la resina è troppo calda o che il ciclo di permanenza è troppo breve. Se il pezzo ha una superficie superiore a 30x30 mm, deve essere svuotato o orientato ad angolo. Maggiore è la superficie, maggiore deve essere il tempo di ritardo; aumentare il "Tempo di ritardo" nelle "Impostazioni di stampa". Non superare un'area solida singola superiore a 20.000 mm² e non utilizzare una dimensione del riquadro di delimitazione solido superiore a 200x122 mm. Se il modello supera queste dimensioni, è necessario svuotarlo o renderlo a reticolo.
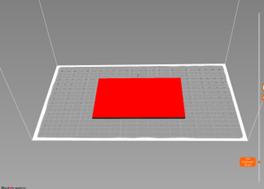

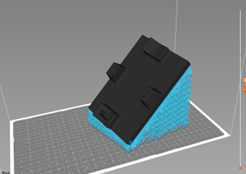
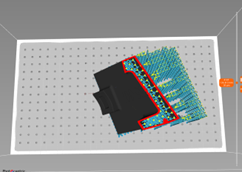
Linea tracciata a una distanza di 20-30 mm dall'inizio
Aspetto:
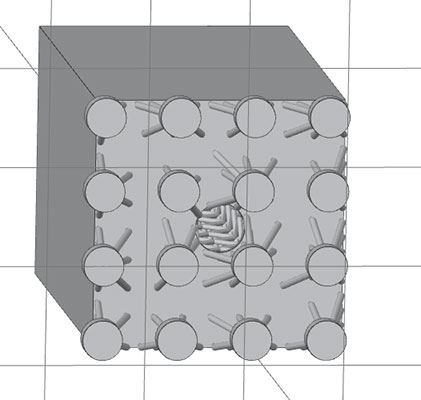
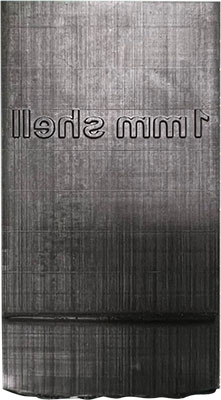
Cause:
Questa linea è causata dalle forze di aspirazione che si generano durante la stampa quando il pezzo si stacca al di sopra del livello della resina nel serbatoio, senza che la pressione possa essere scaricata. Il foro nella base non consente lo scarico della pressione dell'aria quando il pezzo supera il livello della resina nel serbatoio.
Risoluzione dei problemi:
Praticare un foro nella parete laterale per consentire il passaggio dell'aria.
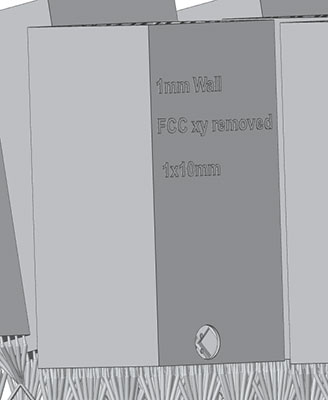
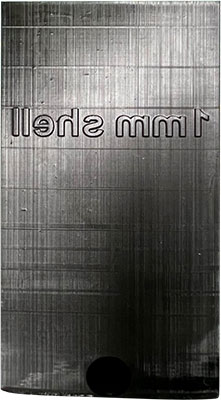
Post-elaborazione
Le informazioni su come utilizzare Photocentric XL e Photocentric XL sono disponibili nei manuali d'uso riportati di seguito.
Guide tecniche e applicative
Precisione dimensionale
La precisione dimensionale è un parametro prestazionale fondamentale per qualsiasi piattaforma di produzione additiva. La nota tecnica riportata di seguito illustra i fattori che influenzano l'accuratezza, la precisione e la ripetibilità dei pezzi stampati con LC Titan. Descrive inoltre in dettaglio come l'hardware, i materiali e il flusso di lavoro di LC Titan contribuiscano a garantire prestazioni costanti in tutto il volume di costruzione.
L'obiettivo è fornire ai nostri utenti tecnici conoscenze pratiche che consentano loro di ottenere risultati ottimali con LC Titan in contesti produttivi particolarmente impegnativi.
Linee guida per la stampa di oggetti di scena
Tutto quello che devi sapere per realizzare fantastici oggetti di scena utilizzando Photocentric LC Titan e Photocentric .
Linee guida per il casting
Le seguenti regole di progettazione ti aiuteranno a ottenere risultati di stampa e fusione ottimali e dimensionalmente precisi, nell’ambito della preparazione del tuo file CAD per la stampa
Linee guida per gli stampi per scarpe
Stampa di stampi per scarpe con la resina HighTemp DL401 e il software VoxelDance Additive su Liquid Crystal
Photocentric
La preparazione dei modelli in Photocentric è una delle fasi più importanti del processo di stampa e vale la pena dedicare del tempo a comprendere appieno come posizionare e orientare i pezzi sulla stampante Magna. Si noti che questa procedura potrebbe differire da quella di altre stampanti utilizzate in precedenza.
L'utilizzo di supporti ottimizzati e un corretto orientamento dei pezzi è fondamentale per realizzare pezzi entro i limiti di tolleranza, ottenere un'eccellente finitura superficiale e garantire tempi di produzione rapidi.
Quando orienti i tuoi pezzi, tieni presente quanto segue:
- centro di gravità: questo valore cambierà man mano che la geometria si modifica durante la stampa.
- aspirazione - evitare l'effetto ventosa inserendo dei fori di sfiato
- Forze di distacco: contrastare qualsiasi forza di trazione verso il basso inclinando il pezzo in modo da ridurre al minimo la superficie per strato, puntando a un aumento graduale della superficie.
- I supporti sono necessari solo in presenza di una sporgenza o di una superficie piana rivolta verso la piattaforma.
- Finitura superficiale: utilizzare i supporti nelle aree in cui la finitura superficiale non è importante, al fine di ridurre al minimo il tempo necessario per la rimozione dei supporti.
Norme generali relative all'orientamento e al sostegno:
Per garantire la precisione dimensionale e compensare eventuali ritiri, consigliamo di aumentare il volume del modello dello 0,5% su tutti e tre gli assi (xyz).
Esegui questa operazione prima di procedere al taglio oppure impostala come predefinita aprendo il profilo della resina che hai scelto, selezionando la scheda "Pre-elaborazione del pezzo" e cliccando su "Scala di correzione del ritiro XYZ" per modificare i valori su 1,005 su tutti e tre gli assi (ovvero aumentando il volume dello 0,5%). Premi "Salva"; in questo modo, ogni volta che selezionerai questa resina, il fattore di scala verrà applicato automaticamente.

Figura 1: Scala di correzione del ritiro
Modelli di posizionamento
Posizionare i modelli troppo vicini tra loro (ad esempio quando si stampano più copie dello stesso modello) comprometterà la qualità superficiale dei pezzi e renderà più difficile il loro lavaggio. Inoltre, potrebbe rendere più difficile completare la post-elaborazione sulla piattaforma, poiché la luce non riuscirà a raggiungere tutte le aree in modo uniforme.
- Mantenere una distanza di almeno 3 mm tra i pezzi. Per le resine nere, la distanza minima tra i modelli deve essere di 5 mm.


Stampe di supporto
Quando si utilizzano i supporti, sollevare i componenti ad un'altezza minima di 10 mm sopra la piattaforma per consentire:
- Strutture di supporto più complesse
- Rimozione più agevole dei pezzi dalla piattaforma
- Rimozione più agevole del supporto dal pezzo
- Quando si stampano superfici di grandi dimensioni, aumentare l'altezza dei supporti a 20-30 mm.
Spessore minimo della parete
- per resine rigide come High Tensile e Hard, impostare il valore su 0,5 mm
- per le resine flessibili, come Flexible, impostare il valore su 2 mm
Diametro minimo della punta di supporto
- per tutti i materiali rigidi è pari a 0,6 mm
- per tutte le resine flessibili è di 1,2 mm
Consigli e trucchi per l'orientamento dei modelli
È preferibile stampare i pezzi piatti in verticale

I modelli piatti con ampie superfici non dovrebbero essere stampati in piano, direttamente sulla piattaforma di stampa o con supporti corti. Le ampie superfici aderiscono troppo alla piattaforma e si danneggiano facilmente durante la rimozione. Inoltre, il flusso della resina creerà una superficie irregolare attorno al modello. La stampa in piano e/o su supporti corti può causare la deformazione del modello a causa del restringimento e richiede più tempo per rimuovere il materiale di supporto.

I modelli piatti devono essere stampati in verticale. Il modello può quindi essere posizionato direttamente sulla piattaforma di stampa. In alternativa, sollevare il modello di 10 mm sopra la piattaforma di stampa e sostenere la superficie inferiore.
Questo orientamento riduce al minimo la superficie che richiede l'uso di supporti. Il modello risulterà così liscio su entrambi i lati e si impiegherà meno tempo a rimuovere i supporti.
Stampa con un angolo di 45 gradi rispetto agli assi x, y e z

Questo modello presenterà una superficie irregolare su un lato, poiché i pixel si spostano su di esso. Questo perché è stato orientato solo lungo l'asse x.

Per ottenere una finitura superficiale uniforme ed evitare la comparsa di linee di spostamento dei pixel sulle superfici piane, ruota il modello di 45 gradi rispetto agli assi x, y e z.
Scatole angolari a 45 gradi rispetto a tutti gli assi e con un'altezza di 15 mm dalla piattaforma

Il semplice orientamento di modelli piatti di grandi dimensioni su uno o due assi provocherà una deformazione dei primi strati creati dalle forze di distacco e dallo spostamento del baricentro.

Ruotare i modelli di grandi dimensioni, piatti o a forma di scatola, di 45 gradi su tutti e tre gli assi e sollevare il modello di 15 mm dalla piattaforma.
Questo orientamento comporta un graduale aumento della superficie, riducendo il rischio di deformazioni e di ritiro anisotropico nel modello stampato.
La stampa in verticale riduce il numero di supporti necessari

La stampa orizzontale di questo pezzo richiederebbe numerosi supporti sulla superficie inferiore, il che comporterebbe tempi più lunghi per la preparazione del file e per la rimozione dei supporti nella fase di post-elaborazione. Inoltre, senza supporti interni, il pezzo potrebbe deformarsi.

Se si posiziona questo tipo di modello in verticale, saranno necessari meno supporti. La stampa richiederà più tempo rispetto all'orientamento orizzontale, ma si risparmierà sulla post-elaborazione e si otterrà una finitura superficiale migliore.

Non stampare forme tubolari in orizzontale. Il modello si deformerà e la cavità interna passerà da circolare a ovale. L'aggiunta di supporti interni può aiutare a evitare la deformazione, ma aumenterà il tempo necessario per la preparazione del file e la post-elaborazione.
Orientare questo modello con un angolo di 45 gradi richiederebbe molti supporti e una post-elaborazione aggiuntiva.

Posizionare il tubo in verticale per ottenere una finitura superficiale ottimale e la massima precisione dimensionale. Sollevare il modello di almeno 10 mm dalla piattaforma per evitare che si stacchi a causa delle forze di aspirazione. In questo modo sarà anche più facile rimuovere i pezzi dalla piattaforma.
Introduzione ai supporti per elementi strutturali
1) Suggerimento per l'assistenza
2) Primo raggio
3) Giunto superiore a moltiplicatore
4) Palo
5) Piede

Impostazioni di supporto consigliate per materiali rigidi come High Tensile, Hard o Durable
Impostazioni predefinite e consigliate per la lunghezza del primo raggio e il diametro del giunto.
Nella "Modalità assistenza", clicca sulla scheda "Generazione assistenza (Avanzate)".
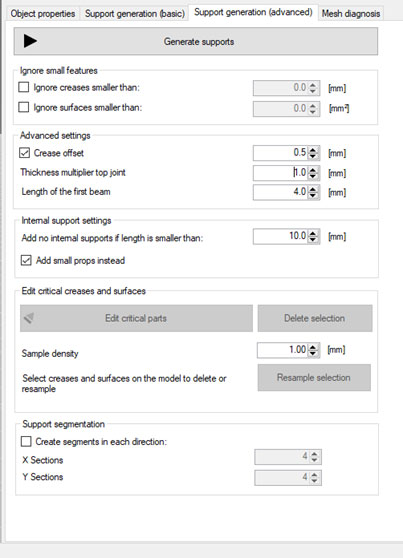
Clicca per ingrandire
Impostazioni di supporto per modelli di piccole dimensioni (altezza di stampa fino a 100 mm).
Nella "Modalità assistenza", clicca sulla scheda "Generazione assistenza (base)".

Clicca per ingrandire
Supporti minimi per modelli di medie dimensioni (altezza di stampa fino a 200 mm).
Nella "Modalità assistenza", clicca sulla scheda "Generazione assistenza (base)".

Clicca per ingrandire
Supporti minimi per modelli di grandi dimensioni (altezza di stampa fino a 250 mm).
Nella "Modalità assistenza", clicca sulla scheda "Generazione assistenza (base)".
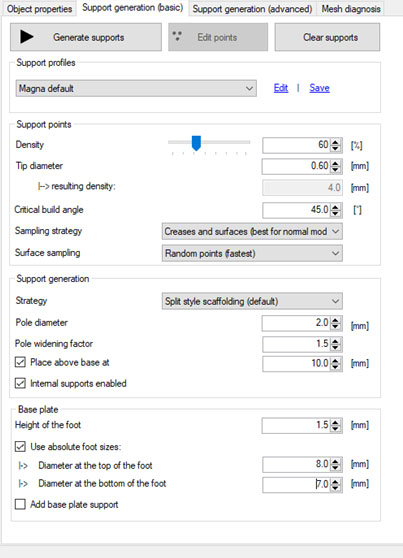
Clicca per ingrandire
Supporti minimi per modelli di grandi dimensioni
(fino all'altezza massima di costruzione)
Nella "Modalità assistenza", clicca sulla scheda "Generazione assistenza (base)".

Clicca per ingrandire
Dimensioni minime del supporto interno.
Fai clic su "Configurazione" dal menu "File".
Fai doppio clic suLiquid Crystal , quindi sulla scheda «Supporto manuale».

Clicca per ingrandire
Dimensioni minime dei supporti interni nei casi in cui la distanza tra due pareti sia superiore a 50 mm.
Fai clic su "Configurazione" dal menu "File".
Fai doppio clic suLiquid Crystal , quindi sulla scheda «Supporto manuale».

Clicca per ingrandire
Dimensioni minime dei supporti per alberi.
Fai clic su "Configurazione" dal menu "File".
Fai doppio clic suLiquid Crystal , quindi sulla scheda «Supporto manuale».

Clicca per ingrandire
Dimensioni minime dei supporti singoli per modelli alti fino a 100 mm
Fai clic su "Configurazione" dal menu "File".
Fai doppio clic suLiquid Crystal , quindi sulla scheda «Supporto manuale»

Clicca per ingrandire
Dimensioni minime dei supporti singoli per modelli fino a 150 mm
Fai clic su "Configurazione" dal menu "File".
Fai doppio clic suLiquid Crystal , quindi sulla scheda «Supporto manuale»

Clicca per ingrandire
Dimensioni minime dei supporti singoli per modelli fino a 250 mm
Fai clic su "Configurazione" dal menu "File".
Fai doppio clic suLiquid Crystal , quindi sulla scheda «Supporto manuale».

Clicca per ingrandire
Dimensioni minime dei singoli supporti per i modelli con altezza massima di stampa
Fai clic su "Configurazione" dal menu "File".
Fai doppio clic suLiquid Crystal , quindi sulla scheda «Supporto manuale».

Clicca per ingrandire
Impostazioni di supporto consigliate per materiali morbidi come Flexible
Impostazioni predefinite e consigliate per la lunghezza del primo raggio e il diametro del giunto.
Nella "Modalità assistenza", clicca sulla scheda "Generazione assistenza (Avanzate)".
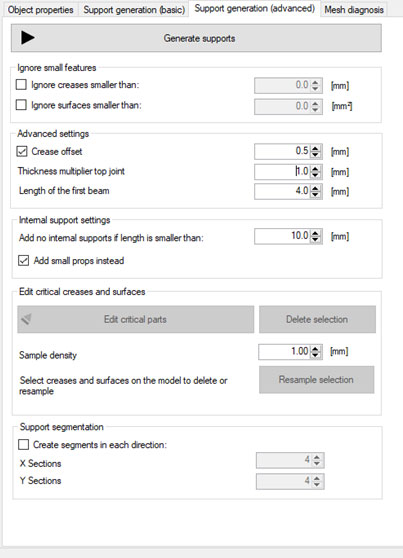
Clicca per ingrandire
Supporti minimi per modelli di piccole dimensioni (altezza di stampa fino a 100 mm).
Nella "Modalità assistenza", clicca sulla scheda "Generazione assistenza (base)".

Clicca per ingrandire
Supporti minimi per modelli di medie dimensioni (altezza di stampa fino a 250 mm).
Nella "Modalità assistenza", clicca sulla scheda "Generazione assistenza (base)".

Clicca per ingrandire
Supporti minimi per modelli di grandi dimensioni (altezza massima di stampa)
Nella "Modalità assistenza", clicca sulla scheda "Generazione assistenza (base)".

Clicca per ingrandire
Dimensioni minime interne del supporto.
Fai clic su "Configurazione" dal menu "File".
Fai doppio clic suLiquid Crystal , quindi sulla scheda «Supporto manuale».

Clicca per ingrandire
Consigli e suggerimenti per la realizzazione di strutture di sostegno
Clicca su «Modalità di supporto» e seleziona l'opzione desiderata.
![]()
In questo modo verranno generati automaticamente i supporti.
Controllare sempre visivamente che tutte le aree critiche siano state fissate.

Se ci sono aree che richiedono un supporto aggiuntivo, premere
![]()
Quando vedi le aree non sostenute, clicca sulle zone che necessitano di rinforzo per aggiungere ulteriori supporti.
La distanza tra i supporti deve essere di 2-3 mm. Come riferimento, la dimensione delle maglie della griglia della piattaforma è di 5x5 mm.
Una volta che tutte le aree critiche sono state prese in carico, premere ![]()


I supporti automatici non sempre inseriscono supporti in tutte le zone critiche. In questa foto, i supporti sul fondo sono stati inseriti solo su un lato. Questo modello crollerà o si deformerà in questa zona a causa della forza di gravità e delle forze di distacco.

Quando si utilizzano i supporti automatici, modificare sempre il modello per aggiungere ulteriori supporti, se necessario. I supporti devono essere sufficientemente robusti da sostenere il modello e resistere alla forza di gravità e alle forze di distacco durante la stampa. Inoltre, i supporti devono trovarsi il più vicino possibile al bordo del modello.

In alcuni casi, i supporti automatici non sono sufficienti. Nell'esempio sopra riportato, è necessario aggiungere dei supporti manuali per sostenere gli angoli critici e rendere la struttura abbastanza robusta da sostenere il pezzo. Se stampato senza supporti aggiuntivi, il pezzo si romperà o si deformerà durante la stampa.

Questo è un esempio di combinazione ottimizzata di supporti automatici e regolazioni manuali. Tutti gli angoli critici sono sostenuti, i supporti sono distribuiti in modo uniforme e con la giusta densità.


Senza supporti su entrambi i bordi, i primi strati inizieranno a deformarsi, i bordi non risulteranno ben definiti e la stampa potrebbe non riuscire.

I primi strati sono molto importanti. I bordi smussati devono essere sostenuti da entrambi i lati per mantenere un bordo ben definito e netto.

Se si posiziona il pezzo in verticale sopra la piastra, direttamente o su dei supporti, i primi strati si deformeranno causando un’incurvatura.

Se le dimensioni e la forma del modello lo consentono, orientarlo ad angolo rispetto a tutti gli assi.


Una distanza tra i punti di appoggio superiore a 3 mm causerà una superficie irregolare nei punti in cui sono presenti sporgenze. Distanze superiori a 5 mm provocheranno deformazioni e delaminazioni.

La distanza tra i supporti deve essere inferiore a 2 mm e il più vicina possibile al bordo.

I supporti devono essere posizionati vicino al bordo.

Se i punti di appoggio sono troppo lontani dal bordo, il modello risulterà irregolare e deformato.

Senza supporti interni, i fori si deformano e assumono una forma ovale.

Per fori circolari di diametro superiore a 2 mm, aggiungere un supporto interno.

I piedini di supporto inclinati verso il basso come sopra saranno più difficili da rimuovere.

Aggiungendo dei piedini di appoggio inclinati verso l'alto come mostrato, sarà più facile rimuovere il pezzo.


Non stampare modelli di grandi dimensioni in piano. Sarà molto difficile rimuoverli dalla piattaforma e potrebbero rompersi.
La stampa di questa parte, come illustrato, con superfici orizzontali a sbalzo richiederà l'uso di supporti interni per evitare deformazioni. Ciò comporterebbe un lavoro di post-elaborazione aggiuntivo e darebbe luogo a una finitura superficiale scadente.

Orientare questo tipo di modello in verticale senza supporti. Il tempo di stampa sarà più lungo rispetto all'orientamento orizzontale, ma il pezzo richiederà meno tempo di post-elaborazione e presenterà quindi una finitura superficiale migliore. Orientare i pezzi con sporgenze interne in modo che richiedano il minimo di supporti interni. L'opzione migliore è allineare il pezzo con le sporgenze in verticale rispetto al piano di stampa, ottenendo così la migliore finitura superficiale su entrambi i lati.

Se le parti sporgono di oltre 1 mm e presentano angoli acuti, aggiungere dei supporti per mantenere il bordo ben definito.

Se gli elementi sporgono di oltre 2 mm e presentano angoli arrotondati, aggiungere dei supporti per mantenere la forma del bordo.

Se le sporgenze sono inferiori a 2 mm e sono autoportanti su entrambi i lati, non è necessario aggiungere dei supporti al centro.
Svuotamento
Photocentric offre la possibilità di svuotare modelli di grandi dimensioni (purché la geometria del modello e l'applicazione lo consentano).
La svuotatura riduce il consumo di resina e, di conseguenza, il costo di stampa. Inoltre, riduce il peso, il che può contribuire a migliorare la qualità di stampa e il tasso di successo.
Lo spessore minimo delle pareti per la tecnica della «fusione a cera persa» è di 0,5 mm, mentre per i modelli di prototipazione di grandi dimensioni in generale è di 2 mm.

Una volta completata la svuotatura, consigliamo di aggiungere una struttura di riempimento per rendere i modelli più rigidi e sostenere gli sbalzi interni.
Il diametro minimo di riempimento è di 0,5 mm per i pezzi realizzati con la tecnica della «fusione a cera persa», con una dimensione delle celle di 5 mm.
Le impostazioni predefinite sono un diametro di riempimento di 1 mm e una dimensione delle celle di 5 mm.

Nella "Vista trasparente" è possibile verificare la struttura del riempimento.
La svuotatura e il riempimento consentono di risparmiare fino all'80% di resina, garantendo comunque la rigidità dei modelli.
I modelli cavi devono avere dei fori di drenaggio per ridurre l'effetto di aspirazione durante la stampa.
Seleziona «Foro di drenaggio flessibile» ![]() in modalità «Assistenza».
in modalità «Assistenza».
Il diametro minimo del foro di scarico è di 4 mm.


Se i modelli cavi, come ad esempio le bottiglie, non dispongono di fori di drenaggio, la pressione interna può rompere le pareti o creare delle linee visibili su tutta la superficie del modello.

Ai modelli cavi devono essere aggiunti dei fori di drenaggio. I fori di drenaggio riducono l'effetto ventosa durante la stampa.
Esempio 1

Se si orienta questo modello con un angolo troppo acuto, come mostrato qui, si otterrà un tempo di stampa inutilmente lungo, sarà necessario utilizzare un maggior numero di supporti, con un conseguente aumento dei tempi di post-elaborazione, e la finitura superficiale risulterà scadente.

La posizione ottimale per un modello a forma di scatola consiste nel sollevare il pezzo dalla piastra di 10 mm, ruotarlo attorno a tutti e tre gli assi e sostenere adeguatamente la superficie inferiore.

Esempio 2

Supporti generati automaticamente per il coperchio di una custodia per tablet.

I bordi non sono adeguatamente sostenuti e si deformeranno durante la stampa. I primi strati si incurveranno e si deformeranno a causa delle forze di distacco e della mancanza di supporti.

La funzione di supporto automatico riconosce solo i bordi esterni come sporgenze e non supporta le superfici interne, che rimangono comunque aree critiche.

Se si stampa questo modello in verticale, con la lunghezza o la larghezza parallela alla piastra, si verificherà una deformazione nei primi strati. Anche lo sbalzo del bordo superiore potrebbe deformarsi. Ove possibile, seguire la regola della costruzione graduale, procedendo gradualmente da una superficie più piccola a una più ampia.

Dopo aver applicato i puntelli automatici, è necessario installare dei puntelli manuali sulle superfici interne. È necessario aggiungere ulteriori puntelli, distribuiti in modo uniforme e in modo da coprire tutte le aree interne.

Struttura di supporto ottimizzata dopo le regolazioni manuali.

Se disponi di spazio sufficiente, ti consigliamo di stampare questa parte in verticale con un angolo di 45 gradi rispetto alla piattaforma.
I tempi di stampa saranno più lunghi, ma quelli di post-elaborazione più brevi, poiché le superfici interne sono autoportanti. Anche la finitura superficiale risulterà migliore.
Assicurarsi che il pezzo sia sollevato di 10 mm dalla piastra.

Esempio 3

Questo orientamento non è consigliabile. Ora tutte le alette sono a sbalzo e necessitano di un sostegno (i supporti automatici non sarebbero sufficienti). Questo orientamento comporterebbe un maggiore carico di lavoro sia per il sostegno che per la finitura.

Quando si sceglie l'orientamento di stampa, è bene valutare come ridurre al minimo le sporgenze. In questo caso, le alette del motore vengono mantenute intatte con un tempo minimo di post-elaborazione, richiedendo supporti solo su un lato. È inoltre possibile aggiungere alcuni supporti interni all'interno del cilindro.

Per evitare deformazioni, stampa le superfici sottili e piatte in verticale. Se orienti questo modello a 45 gradi, il corpo principale verrà stampato correttamente, ma le alette si deformeranno leggermente poiché non sono state sufficientemente sostenute per resistere alle forze di distacco e alla gravità.

Si tratta di una combinazione ottimizzata che prevede l'uso di supporti automatici con una densità del 5% e la regolazione manuale dei supporti.

Se posizionate con un angolo di 45 gradi, non è possibile sostenere adeguatamente le alette e, dopo aver stampato 2-3 mm, queste inizieranno a deformarsi.

Una panoramica dei punti in cui inserire i suggerimenti per l'assistenza manuale.